I opened Leonardo AI late on November 18, 2025 because a friend sent me a portrait with perfect rim light that looked like it came out of a real studio. I thought, okay, is “Leonardo AI professional lighting” just a prompt trick… or can it actually replace me dragging softboxes around my apartment? Not sponsored, just honest results from a week of late-night tests. Below are my notes from ~24 image runs (PhotoReal on, Prompt Magic v3, 1024×1024, Guidance 6–8, Steps 28–32).
Core Lighting Concepts (Why Lighting Matters in AI)
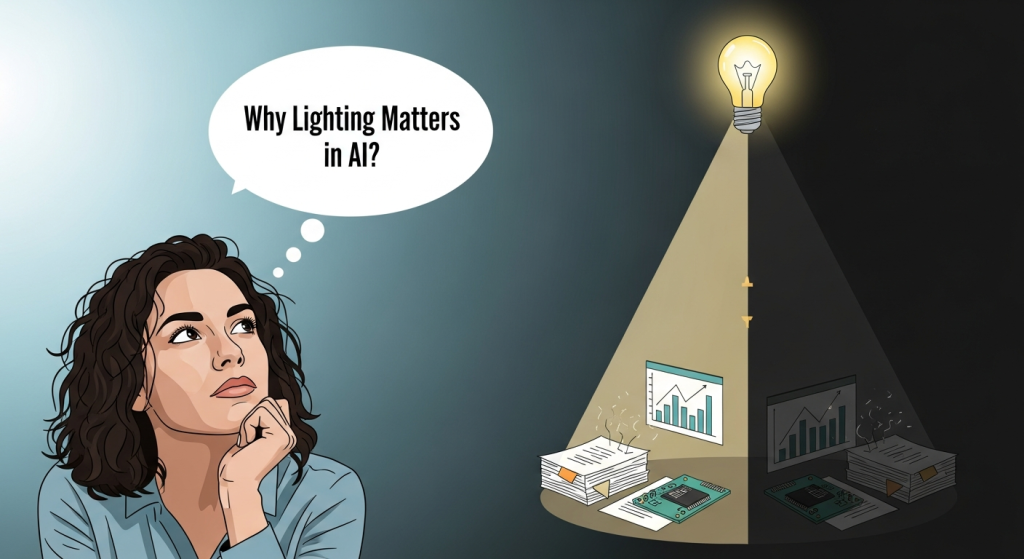
I learned fast: lighting isn’t a garnish, it’s the skeleton of the image. In Leonardo, the model will happily invent surfaces and moods based on your lighting words. If you’re vague, you’ll get mush. If you’re specific, it snaps into place.
Here’s the simple mental model I used (same one I use in real shoots):
- Key light: your main light source. Decide its angle, quality (soft/hard), and distance.
- Fill light: softens shadows. Decide how much (a “low fill” keeps drama: “high fill” flattens).
- Rim/Back light: outlines the subject. Great for separation.
- Ambient light: the room’s overall glow (daylight, tungsten, neon haze, candlelight).
How this translates to Leonardo prompts/settings:
- Name the light quality and direction. “Softbox key at 45° camera-left” beats “good lighting.”
- Name the intent. “Editorial portrait,” “beauty ad,” or “noir still.” Models follow genre cues.
- Anchor reality. Use lens sizes (50mm, 85mm), f-stops (f/2.8), and exposure language (underexposed shadows). The PhotoReal toggle respects these cues more often than art-style models.
- Keep control variables steady while testing. I fixed the seed and Guidance to isolate lighting changes. On Nov 19, swapping only “key: softbox” to “key: bare bulb” changed shadow edge hardness as expected.
Useful controls in Leonardo (as of Nov 2025): PhotoReal + Prompt Magic v3 improved consistency with lighting phrases like “practical lamp spill,” “window key,” and “volumetric fog.” I got the most reliable results using PhotoReal or SDXL-tuned realistic models. If you’re new, Leonardo’s docs are helpful for model and PhotoReal behavior.
8 Lighting Styles (Studio, Rim, Neon, Softbox, Dramatic, Natural, Moody, Volumetric)

Below are the eight styles I tested, plus what actually happened on canvas.
Studio
Prompt vibe: clean, controlled, product-friendly.
What worked: “two-light setup, key softbox 45° left, large bounce fill right, seamless white backdrop, 85mm, f/5.6.”
Notes: Consistent, crisp edges. Great for products and corporate headshots. If you see gray backdrops, add “blown white sweep, high-key.”
Rim
Prompt vibe: subject halo with pop.
What worked: “subtle rim light from behind right, low fill front, matte background.”
Notes: Leonardo nails edge glow but can over-brighten hair. I fixed it by adding “controlled rim, no flare.”
Neon
Prompt vibe: cyber glow: color-driven.
What worked: “neon magenta key from left, cyan rim from right, reflective surfaces, shallow haze.”
Notes: It’s easy to oversaturate. Add “muted skin tones” for portraits. When I added “ACR color grade,” colors looked more filmic.
Softbox
Prompt vibe: flattering, soft shadows.
What worked: “large softbox key 45° left, 120cm modifier, feathered, negative fill on far side.”
Notes: Feathered softboxes (aimed slightly away) gave me gentle gradients. Faces looked believable with PhotoReal on.
Dramatic
Prompt vibe: high contrast, cinematic.
What worked: “low-key lighting, single hard key, deep shadows, no fill, chiaroscuro.”
Notes: Guidance 7–8 kept the shadows rich. If details clip, add “retained shadow detail, roll-off highlights.”
Natural
Prompt vibe: daylight, believable color.
What worked: “north-facing window key, soft overcast daylight, white wall bounce fill, 50mm, f/2.8.”
Notes: The phrase “north-facing window” consistently produced gentle, directional light. Add time: “late afternoon” for warmer tones.
Moody
Prompt vibe: subdued, tonal storytelling.
What worked: “soft, directional key, low fill, cool color grade, textured background.”
Notes: I dialed Guidance down to 6 to avoid crushed blacks. Add “film grain subtle” for texture.
Volumetric
Prompt vibe: light shafts through haze.
What worked: “volumetric fog, god rays from window, practical lamp spill, backlit dust particles.”
Notes: Needs clear geometry (windows, blinds) so rays “know” where to travel. Too much fog can wash faces, add “face clarity preserved.”
Lighting Prompt Formula & Templates
Here’s the simple formula I kept next to my keyboard. It’s boring, and it works.
Formula
Subject + Intent/Genre + Camera/Lens + Key Light (type, direction, distance) + Fill (amount/source) + Rim/Back (if any) + Environment/Ambient + Exposure/Grade notes + PhotoReal on
Templates you can paste into Leonardo (tested Nov 20, 2025):
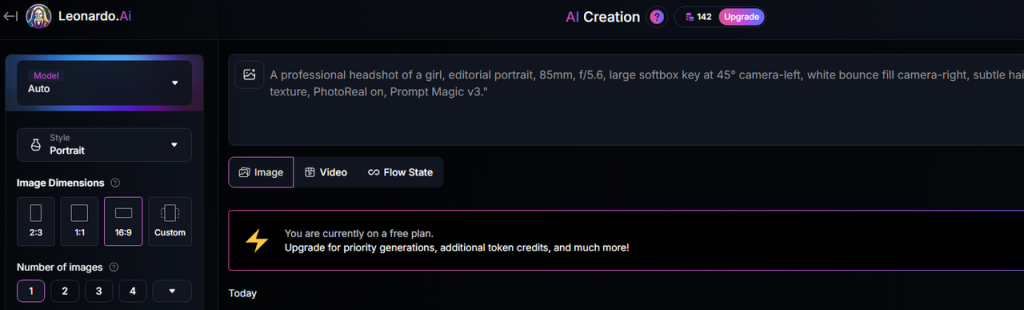
Clean Studio Portrait
“A professional headshot of [subject], editorial portrait, 85mm, f/5.6, large softbox key at 45° camera-left, white bounce fill camera-right, subtle hair light, seamless white backdrop, high-key, natural skin texture, PhotoReal on, Prompt Magic v3.”
Neon Product Shot
“Close-up of [product], cyberpunk shelf, 50mm macro feel, neon magenta key left, cyan rim right, reflective acrylic base, slight haze for glow, muted highlights, accurate logo edges, PhotoReal on.”
Natural Window Light
“Candid portrait of [subject] by a north-facing window, lifestyle, 50mm, f/2.8, soft overcast daylight key, white wall bounce fill, warm wood ambient, preserved shadow detail, gentle film grade, PhotoReal on.”
Moody Dramatic Scene
“[Subject] in a moody room, cinematic, low-key lighting, single hard key from high camera-left, no fill, controlled rim, textured dark backdrop, subtle film grain, roll-off highlights, PhotoReal on.”
Pro tip: If compositions drift, lock a seed and lower randomness with higher Guidance (7–8). If skin turns plastic, add “natural pores, micro-contrast,” or try a realism-forward model in Leonardo’s model list.
Common Lighting Mistakes & Fixes

I tripped over these on Nov 18–21 while testing. You might not need to.
- Vague lighting words
Fix: Replace “good lighting” with specifics: “large softbox key 45° left, low fill.”
- Overcooked neon
Fix: Add “muted skin tones, controlled highlights.” Consider lowering saturation in the prompt (“tasteful color grade”).
- Flat faces
Fix: Add direction and shadow: “feathered key, negative fill on far side, slight rim.”
- Messy volumetrics
Fix: Give rays a source: “window blinds,” “church doorway,” and limit fog: “light haze only.”
- Plastic skin
Fix: “natural skin texture, micro-contrast, realistic pores.” Swap to PhotoReal, Guidance 6–7.
- Washed backgrounds in studio shots
Fix: Specify backdrop and exposure: “seamless white sweep, high-key, but preserved edge detail.”
If you want the official knobs and latest features, Leonardo’s docs are the source of truth. I’m not affiliated: just sharing what held up in real runs.
Final thought as a friend: once you control the key, fill, and rim, everything else feels like seasoning. Save a couple templates, keep your seed steady while you tweak, and let the light do the heavy lifting.
Frequently Asked Questions
What is the best way to prompt Leonardo AI for professional lighting?
Use a structured prompt: subject + intent/genre + lens/aperture + key light type and direction + fill level/source + rim/back light + ambient/environment + exposure/grade notes, then enable PhotoReal. Naming specifics like “large softbox key 45° left, low fill” consistently outperforms vague phrases like “good lighting.”
Which settings and models give the most consistent professional lighting in Leonardo AI?
For reliable lighting, use PhotoReal with Prompt Magic v3 and a realism-focused model. Keep Guidance around 6–8, Steps near 28–32, and lock a seed while you iterate. These controls help preserve shadow detail, keep highlight roll‑off natural, and make lighting changes behave predictably.
How to fix overcooked neon or plastic skin when aiming for Leonardo AI professional lighting?
For neon, add “muted skin tones, controlled highlights,” and consider a tasteful color grade. If skin looks plastic, include “natural pores, micro‑contrast, realistic skin texture,” lower Guidance slightly (6–7), and keep PhotoReal on. These cues restrain saturation and encourage believable surface detail under stylized lighting.
Previous posts: