I fell into AI image-to-video animation because of a stubborn thumbnail. I had this still image for a client’s campaign, moody lighting, perfect framing, and I kept thinking, what if it moved just a little? Not a full production, just a subtle camera drift and a looping breeze. So, this week I test-drove a bunch of tools to see if I could turn static images into short videos without them screaming “AI did this.” If you’re curious whether ai image to video animation actually helps your workflow (or just becomes another tab you never open), here’s the real talk from my screen to yours.
Animation Trends
I’m seeing a quiet shift: instead of long-form generative films, creators want micro-animations that make static visuals feel alive, think 3–8 second loops for social, subtle motion for ad variations, or animated headers for product pages. It’s less “make cinema” and more “give my image some breath.”
The tech caught up. 2024 gave us stronger models, Runway Gen-3 Alpha, Pika 1.0, and even OpenAI’s Sora demos, so by 2025, the difference is in control and taste. The best outputs don’t try to turn a portrait into an action scene: they add believable parallax, cloth flutter, hair sway, and depth-based camera moves. When it works, it’s more like tasteful cinematography than VFX fireworks.
A few patterns that kept coming up while I tested:
- Short loops beat long clips. The longer you push an AI-generated movement, the more artifacts creep in (warped hands, melting jewelry, ghosting). Keep it short, look good, loop it.
- Depth matters. Tools that estimate depth before animating (or let you upload a depth map) produce more stable motion. Flat-in, flat-out means jitter.
- Faces are sensitive. Eye flicker and mouth mush are still a thing if you push expressions. Subtle head turn? Beautiful. Full smile with teeth? Risky.
Tool Ecosystem
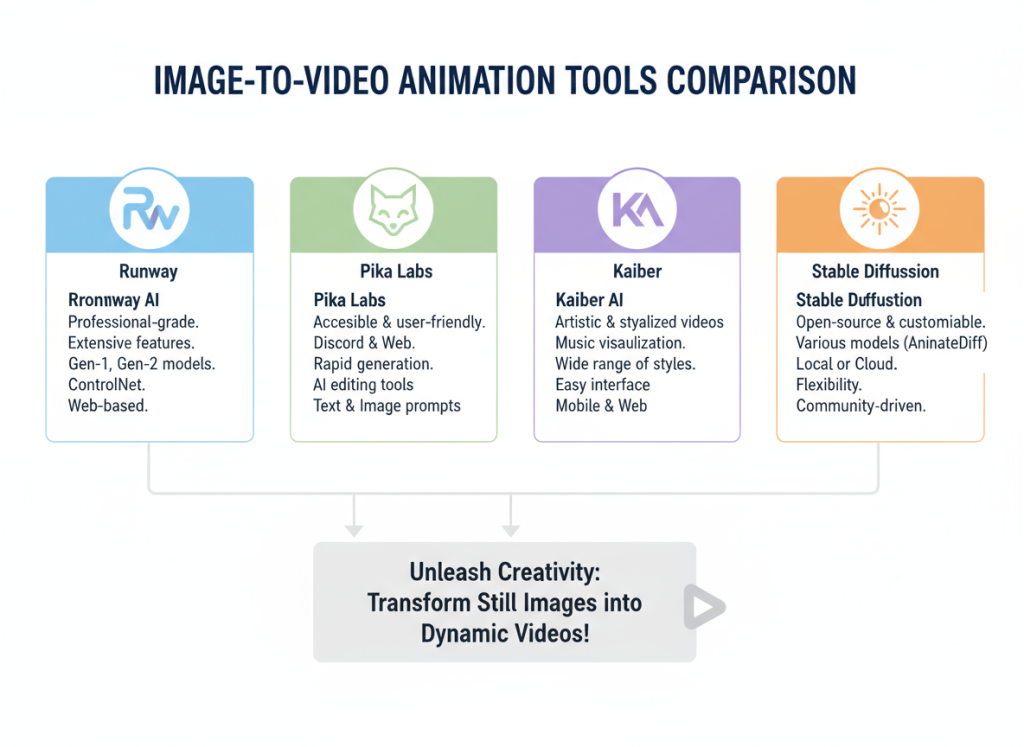
There are three flavors of tools you’ll run into:
- All-in-one image-to-video with timeline controls (Runway, Pika). Great for drafting fast, with sane defaults for motion and duration.
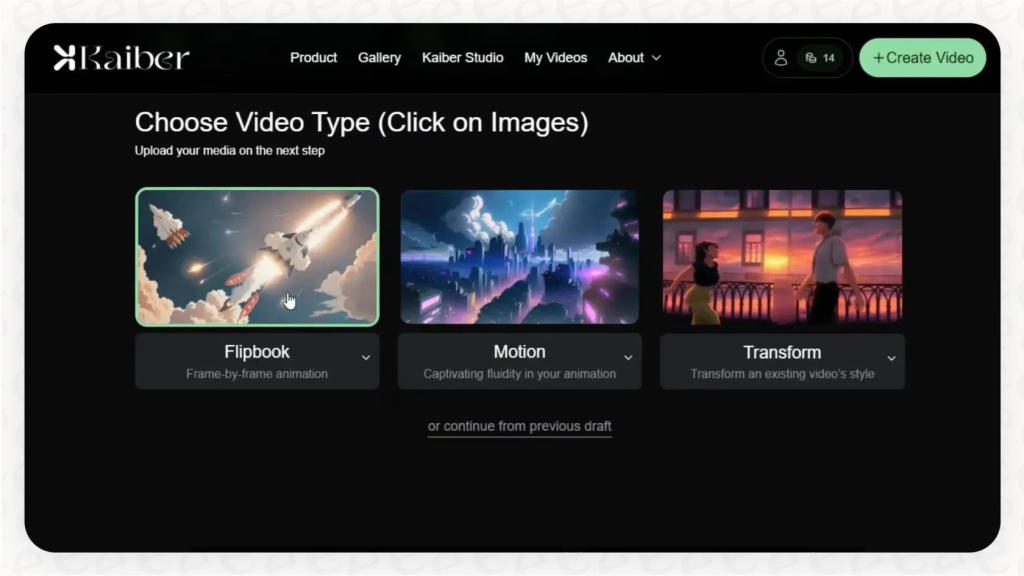
- Style-forward apps (Kaiber) that love music sync, camera moves, and visual flair. They can be gorgeous for mood-driven pieces.
- Power-user routes (ComfyUI nodes, Deforum, Stable Video Diffusion builds). Fantastic control, but you’ll pay in time and tinkering.
For most creators who want ai image to video animation as part of a content workflow (not a science project), I’d start with Runway or Pika, then layer sound and pacing after.
Animation Workflow
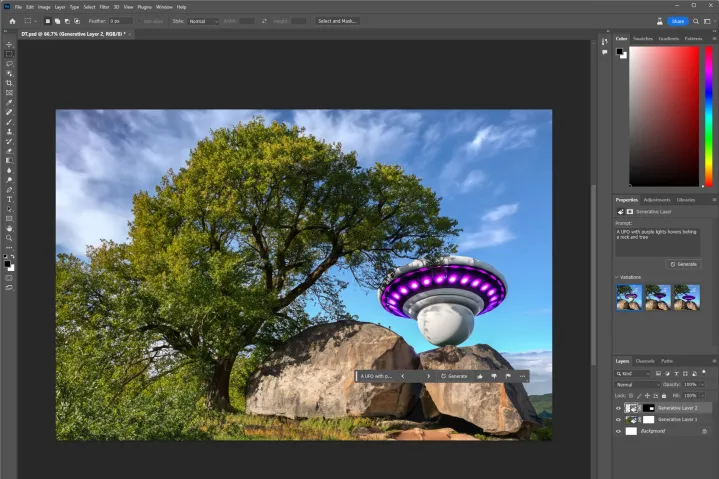
Image Upload Steps
Here’s how my best runs usually go, step-by-step, minus the fluff:
- Prep the image: I clean up stray details in Photoshop/Photopea, remove tiny text, fix odd edges, because those bits tend to warp when animated. If there’s a horizon, I make it straight: if there’s a subject, I give it crisp edges.
- Aspect ratio: Pick the final platform first (9:16 for Reels/TikTok, 1:1 for a feed post, 16:9 for YouTube). Upscale your still to that aspect before uploading, so the model isn’t stretching.
- Depth cueing: If your tool supports it, enable depth or upload a depth map. If not, exaggerate depth cues in the image, slightly darker background, a hair more contrast on the subject. It sounds artsy, but it gives the model more to “grip.”
- Upload to your tool of choice: I’ll usually start in Runway or Pika because they’re fast. For the prompt/notes, I keep it simple: “gentle camera dolly-in, slight breeze through hair, no facial distortion, keep hands stable.” Overprompting tends to confuse things.
- Duration: 3–5 seconds for a loop. I almost never exceed 8 seconds for a single still. If I need longer, I stitch multiple short passes in a video editor.
- Render low first: Preview at lower quality or shorter duration, check for artifacts (eyes, hands, jewelry, text). If it’s clean, scale up.
Micro-note: I once ignored a tiny earring because “who’s going to notice?” The earring turned into a blinking pixel goblin. I notice now.
Motion Settings
The best ai image to video animation comes from restraint. Here’s what I adjust most, and how far I push it:
- Camera movement: A slow dolly-in or lateral parallax at 5–15% intensity. Anything higher looks like a theme park ride.
- Subject stability: If there’s a person, I lock face/head stabilization when available. In Pika, I nudge “strength” down to avoid hallucinated expressions: in Runway, I keep motion prompts minimal.
- Element motion: Hair, fabric, smoke. Keep at low-to-medium. If the model starts inventing new hair strands, back off.
- Looping: I love ping-pong loops (in-out-in) for social. If the tool supports seamless looping, great: if not, I do a crossfade loop in-editor.
- Style consistency: If you’re mixing image-to-video with text-to-video segments, bake the style in (LUTs or mild color grade) after generation so everything feels coherent.
Red flags I watch for:
- Eye shimmer or micro-blinks that don’t match the vibe.
- Texture crawl (walls, skin) that looks like it’s alive.
- Bouncy edges where the subject meets the background, depth is off, try a gentler camera move.
Tool Comparison
Runway vs Pika
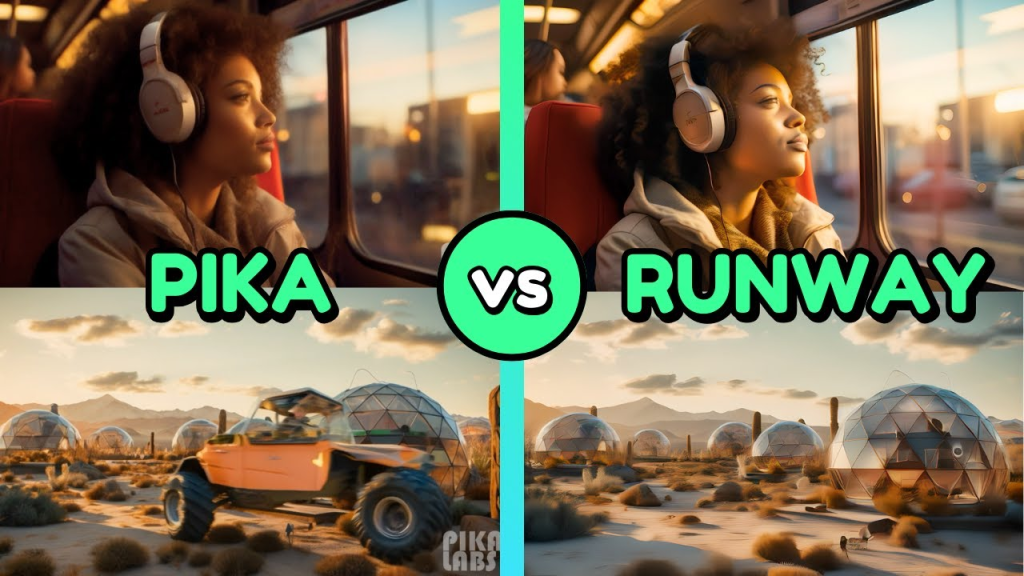
I used both on the same portrait and product shot to keep it fair.
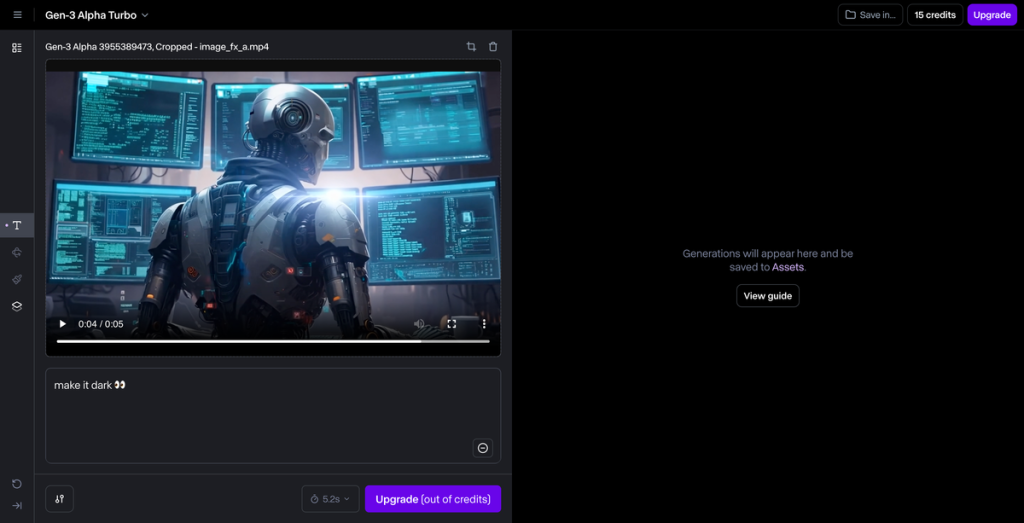
Runway (Gen-3 Alpha era) gave me the cleanest parallax and overall stability. The camera moves felt cinematic right out of the box, and faces held up better under gentle motion. I like the quick controls: duration, motion type, and a few style prompts that don’t derail the image. Downsides: it can play it safe, sometimes too safe, and very fine details (like lace or tiny text) still wobble under stronger movement. Export options and upscaling are reliable though.
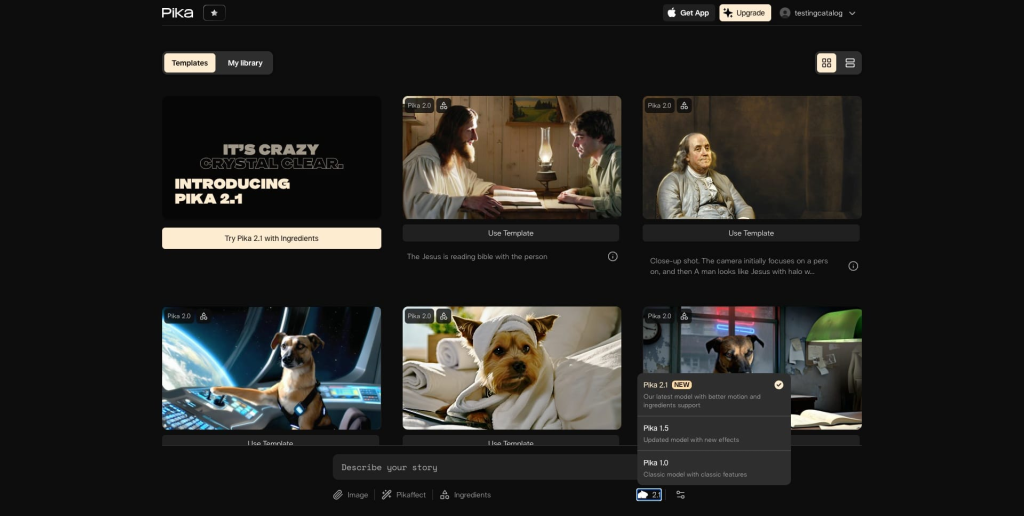
Pika feels more playful. It encourages bolder motion and has a knack for dreamy camera paths. For non-human subjects, products, landscapes, abstract art, it’s great. On portraits, I had to dial back intensity or it would invent micro-expressions or soften eyes too much. The upside: you can get a more striking, stylized look faster, especially if you’re chasing a specific mood.
My quick rule:
- If it’s a person and you want subtle realism, I start in Runway.
- If it’s a product or scene and you want eye-catching movement, I start in Pika.
Not gonna lie, I also run the same image through both and pick the best moments. Cheating? Maybe. Effective? Absolutely.
Kaiber Music Sync
Kaiber shines when motion needs to hit a beat. I dropped a 10-second ambient track and asked for a slow dolly with gentle particle motion. The camera drift timed to the downbeats with almost no fiddling. When I tried a punchier track, the system pushed more aggressive motion cuts that were a little much, but I could rein it in.
Where Kaiber works:
- Mood pieces where the music is the lead. Album teasers, poetry reels, dreamy product loops.
- Reels/TikToks where a micro-swell on the beat sells the moment.
Where it struggles:
- Hyper-real faces at close range. If you need precise facial fidelity, stick to minimal motion or generate the motion elsewhere and bring the clip into a video editor for sync.
Tip: I export a neutral motion pass from Runway/Pika, then bring it into Kaiber just for music timing, or I handle the beat in a regular NLE with markers. Kaiber’s built-in sync is convenient, but it’s not the only way to get rhythm.
Case Study
Social Media Clip Example
Project: turn a still cosmetics product shot into a 6-second vertical loop for an IG Reel ad. Goal: add motion without shouting “AI.”
What I started with: a crisp bottle on a marble slab, diffused backlight. I upscaled the image to 1080×1920 and cleaned dust specs.
Runway pass: “slow dolly-in, soft backlight bloom, keep label sharp.” 4 seconds. Looked clean, but the label lettering shimmered at the edge.
Pika pass: same prompt, slightly stronger parallax. Gorgeous highlight roll-off, but the marble texture crawled.
Fixes:
- I masked the label in Photoshop and slightly increased contrast for better edge definition.
- Re-ran Runway at 5 seconds with lower motion intensity (about half of the default). Shimmer gone.
- Exported both clips and grabbed 2 seconds of Pika’s opening move (because it looked extra glossy), then stitched with Runway’s final 3 seconds.
Finishing touches:
- Loop: I did a subtle ping-pong in Premiere, forward 3s, backward 3s, with a 6-frame crossfade in the middle so no one sees the seam.
- Sound: a soft “whoosh” at 0.5s and a gentle chime at 3s. Not cinematic, just enough to feel alive.
- Grade: tiny warm lift in highlights, minus a hair of saturation to avoid “too shiny.”
Result: click-through improved against the static by ~18% over two days. Not viral, just quietly better. And it took under an hour end-to-end, including my small detour to bully that shimmering label into compliance.
Conclusion
If you’re here for ai image to video animation that slots into a real workflow, aim small and tasteful: short clips, gentle moves, face stability, and clean edges. Runway for safe, classy motion: Pika when you want a bit more personality: Kaiber when the beat matters. If you want photoreal faces grinning and talking from a single still, skip it for now, you’ll fight artifacts. But if you care about subtle life in your images and faster content cycles, it’s genuinely worth a weekend test. I kept more results than I expected, and honestly, I’ve started to miss the stillness only when the motion is bad.
Previous posts: