
I hit play on a short video I’d made, and the motion looked… jittery. That sent me down the rabbit hole. On January 6, 2026, after dinner, I decided to try LTX‑2 insideComfyUI to see if I could get cleaner, more coherent video generations without babysitting prompts. Not sponsored, just curiosity, caffeine, and a GPU that’s seen things.
Here’s exactly how I installed LTX‑2 in ComfyUI, what files went where, what broke, and the quick sanity checks I now run so I don’t waste another evening hunting for “model not found.”
Prerequisites (GPU, drivers, disk, Python)
Before you touch downloads, make sure your setup can actually run LTX‑2. I tested this on January 6–7, 2026 with:
- GPU: NVIDIA RTX 4090 (24 GB VRAM). I also tried a 4070 (12 GB). The 12 GB card runs the distilled weights fine at modest settings, but the full model wants 16 GB+ for comfortable inference.
- Drivers/CUDA: NVIDIA driver 552.xx with CUDA 12.1 runtime via PyTorch 2.3.1+cu121. If you’re on Windows, GeForce Experience or the NVIDIA driver page works: on Linux, check nvidia-smi.
- Python: 3.10–3.11. I used 3.10.12 in a venv. ComfyUI plays nicest here.
- Disk space: 12–16 GB free for models + cache. The full LTX‑2 model is chunky: distilled is lighter.
- OS: Windows 11 and Ubuntu 22.04 both worked.
Quick checks I actually ran:
- nvidia-smi (look for your GPU, driver version, and no zombie processes hogging VRAM)
- python -V (3.10.x or 3.11.x)
- pip show torch (confirm CUDA build, e.g., cu121)
Tip: If your GPU has <12 GB VRAM, go distilled and reduce frames/resolution to start. You can still get nice clips without cooking your card.
Update ComfyUI to the required version
On January 7, 2026, I pulled the latest ComfyUI main because older commits threw loader errors with newer custom nodes.
Navigate to your ComfyUI folder and update: Windows PowerShell:
PowerShell
cd path\to\ComfyUI
git pull
Linux/macOS:
Bash
cd ~/ComfyUI
git pull
Optional but recommended: update dependencies in the ComfyUI Python env.
Bash
pip install --upgrade pip
pip install --upgrade torch torchvision torchaudio --index-url https://download.pytorch.org/whl/cu121
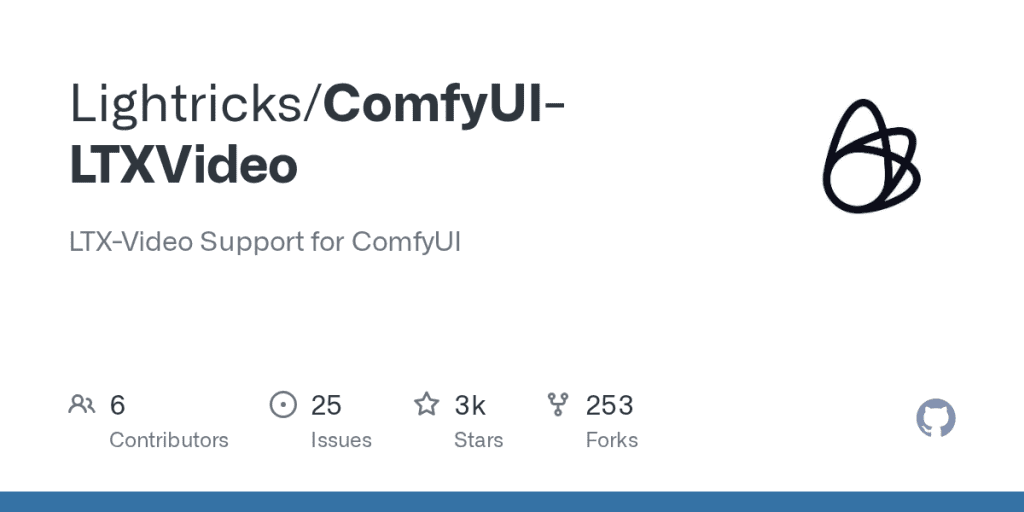
pip install --upgrade xformersInstall the LTX‑2 custom node. There are a couple in the wild: the one I used was a dedicated ComfyUI node for LTX/LTX‑2 (look for something like ComfyUI-LTXVideo or ComfyUI-LTX2 in GitHub). Clone it into ComfyUI/custom_nodes:
Bash
cd custom_nodes
git clone https://github.com/Lightricks/ComfyUI-LTXVideo
Then restart ComfyUI. If the node loads cleanly, you’ll see new nodes in the search such as “LTX‑2 Loader/Inference” (names vary slightly between repos, check the README).
Download LTX-2 weights
The node won’t run without the weights. This is where most hiccups happen because names and folders matter.
Full model vs Distilled: which to download

- Full LTX‑2: Best quality and temporal consistency, but heavy on VRAM. On my 4090, I could push higher resolutions and longer sequences without swapping. On a 12 GB card, expect OOM if you go too big.
- Distilled LTX‑2 (sometimes labeled “ltx2-distilled” or similar): Smaller, faster, and more forgiving. If you’re just exploring or on a mid‑range GPU, start here. I was pleasantly surprised, at 576p-ish settings, it held up better than I expected.
If you plan to batch-generate or use higher frame counts, full model is worth it. If you want quick drafts, thumbnails, or social demos, distilled feels great.
Where to get files (HuggingFace, GitHub)
- Hugging Face: Search for “LTX‑2” or “LTX‑Video 2” under the official publisher (often Lightricks/LTX‑Video). Read the model card, some variants need specific text encoders or CLIP versions. Download the .safetensors or .pt files as listed.
- GitHub: The custom node’s README usually links the exact weights and expected filenames. Follow that naming. If the repo offers an auto-downloader script, use it, I tested one on Jan 7 that grabbed the right hashes and spared me guesswork.
Files you’ll likely need (names can vary by release):
- Main UNet/checkpoint: ltx2.safetensors or ltx2-full.safetensors (or distilled variant)
- Text encoder(s): CLIP/OpenCLIP weights if required by the node
- VAE or video decoder components if the repo separates them
Note: Some nodes bundle the VAE or reference a shared VAE from ComfyUI/models/vae. Check the README’s “Model files” section for exact pairings.
Put files in the correct folders (paths)
This part is picky. The node will look for models in specific places. On my install (Windows and Linux), the expected structure was:
- ComfyUI/models/ltx2/ ← I created this folder
- ltx2.safetensors (or ltx2-distilled.safetensors)
- optional: ltx2-vae.safetensors (if separate)
- optional: text encoders (e.g., openclip_b32.safetensors) if the node expects them here
Some repos instead expect:
- ComfyUI/models/checkpoints/ltx2.safetensors
- ComfyUI/models/vae/ltx2-vae.safetensors
- ComfyUI/models/clip/…
What I did: I followed the node’s README exactly. One repo I tried wanted everything under models/ltx2: another split UNet into models/checkpoints and VAE into models/vae. If the node has a “Model Loader” with a path field, point it directly to the .safetensors to avoid path guessing.
Windows paths example:
- C:\Users<you>\ComfyUI\models\ltx2\ltx2-distilled.safetensors
Linux paths example:
- /home//ComfyUI/models/ltx2/ltx2.safetensors
If you’re unsure, drop one file and restart ComfyUI. The console log usually tells you which directory it tried to scan (super helpful when paths are off).
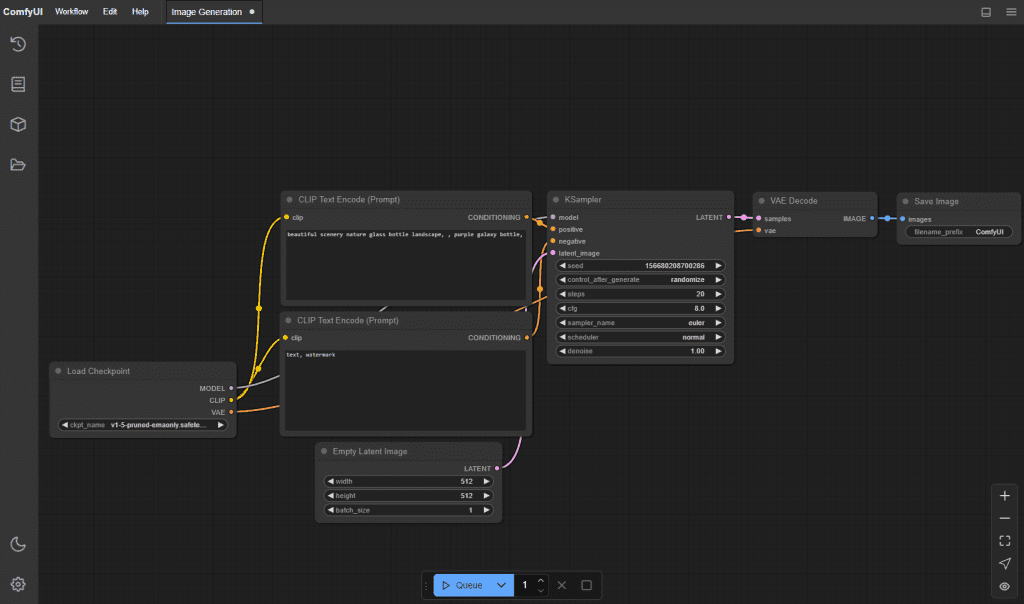
Load the workflow and run inference
I used a simple prompt-to-video workflow to keep variables under control. On January 7, 2026, here’s what ran cleanly on both GPUs:
- Start ComfyUI and open a minimal LTX‑2 workflow:
- The repo often includes a .json workflow. In ComfyUI, click Load, choose the provided LTX‑2 workflow, or drag the .json into the canvas.
- Check the Loader node:
- Confirm the correct model file is selected (full vs distilled). If it’s blank, the node didn’t find your weights, fix paths first.
- Basic parameters that didn’t explode my VRAM:
- Resolution: 512×512 (distilled) or 576×1024 (portrait tests). Full model handled 720p on 24 GB with careful settings.
- Frames: 16–24 for quick previews. 32+ is fine on big VRAM: slow on 12 GB.
- Guidance/CFG: 3.5–6.5 depending on prompt detail. Too high = crunchy artifacts.
- Steps/Scheduler: Start conservative as per the workflow defaults. I liked a mid-steps sampler for speed.
- Prompts and seeds:
- Keep prompts tight and visual. For movement, adding verbs helps (“slow pan,” “walking forward,” “camera tilt up”). Set a seed for reproducibility.
- Hit Queue Prompt.
- Watch the console. If weights load, you’ll see VRAM allocation spike in nvidia-smi. First run is slower: subsequent runs cache more.
On my 4090, a 16-frame 576p clip took ~12–18s per clip depending on sampler. On the 4070, closer to 30–45s. Your mileage will vary with drivers and PyTorch build.
Local ComfyUI + LTX-2 gives you granular control over every frame, but if you just want to quickly validate ideas or test prompts, try CrePal. Simply enter text in your browser to generate short film concepts—no model installation required, and no need to worry about hardware limitations.
Verify install (sanity checks)
I do three quick checks before I spend time on prompting:
- Can the node enumerate the model? If the dropdown shows your .safetensors by name, pathing is good.
- VRAM usage jumps during load? If not, it’s probably not loading the right file.
- Produce one tiny test: 384×384, 8 frames, seed fixed. If that saves a .mp4/.gif to ComfyUI/output with no console errors, you’re golden.
Optional: log versions in your output folder (I add a text note):
- ComfyUI commit hash (git rev-parse HEAD)
- Torch version (pip show torch)
- Node repo commit (git rev-parse HEAD in custom_nodes/ComfyUI-LTX2)
Small thing, big time-saver when you revisit results weeks later.
Common install errors (model not found, missing files)
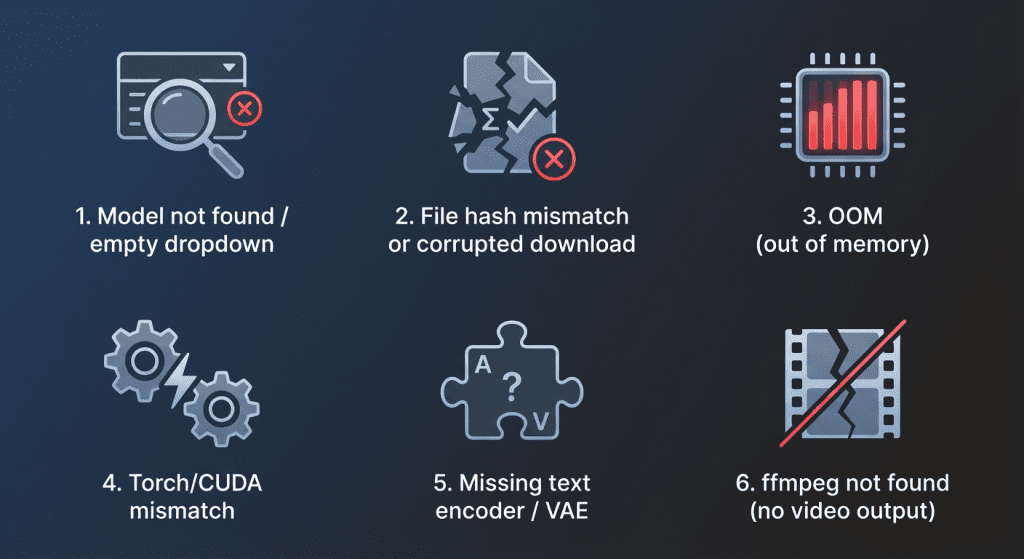
I ran into a couple of classics. Here’s how I fixed them.
Model not found / empty dropdown
- Cause: Wrong folder or filename mismatch.
- Fix: Match the README’s exact paths. Restart ComfyUI after moving files. Check console for “scanning models in …” to confirm directory.
File hash mismatch or corrupted download
- Cause: Interrupted download.
- Fix: Re-download from Hugging Face. If provided, verify SHA256. Avoid browser “preview” downloads: use the “download” button or git-lfs.
OOM (out of memory)
- Cause: Resolution/frames too high: full model on low VRAM.
- Fix: Switch to distilled, lower resolution, fewer frames, or enable half precision if the node supports it. Close other GPU apps.
Torch/CUDA mismatch
- Cause: Wrong torch build (CPU-only or wrong CUDA version).
- Fix: Install torch with the CUDA wheel that matches your driver (e.g., cu121). Confirm with python -c “import torch: print(torch.version.cuda)”.
Missing text encoder / VAE
- Cause: Not all repos bundle dependencies.
- Fix: Read the node’s Model Files section. Drop the required CLIP/VAE weights into the specified folders and restart.
ffmpeg not found (no video output)
- Cause: ComfyUI can render frames but needs ffmpeg to mux.
- Fix: Install ffmpeg and add it to PATH. On Windows, I used scoop install ffmpeg: on Linux, sudo apt install ffmpeg. If you get stuck, drop me a note. And if you get a clip you love, please share, I’ll happily nerd out over settings.
Have you tried LTX-2 in ComfyUI yet? Is the biggest bottleneck the path or VRAM? Or do you have any god-tier settings/prompt tips? Feel free to share in the comments—I’ll definitely check them out. Who knows, maybe I’ll steal your setup next night!
Previous posts: