Hey, I’m Dora. I was staring at a 10-page script for a client explainer video at 11 PM last Tuesday, knowing I had maybe six hours to deliver something decent. That’s when I thought — what if I just fed this whole thing into one of those AI script-to-video tools? Not as a cheat, but as a legitimate starting point. So I did. And honestly? Some parts blew my mind. Other parts… Well, let’s just say I learned which corners AI still can’t cut.
What Is Script to Video Conversion? (AI Script-to-Video Explained)
Script-to-video is basically when you paste text — dialogue, scene descriptions, whatever — and AI generates actual video footage from it. Not just slideshows with text overlays. I’m talking about scenes, visuals, transitions, sometimes even voiceovers synced to your script.
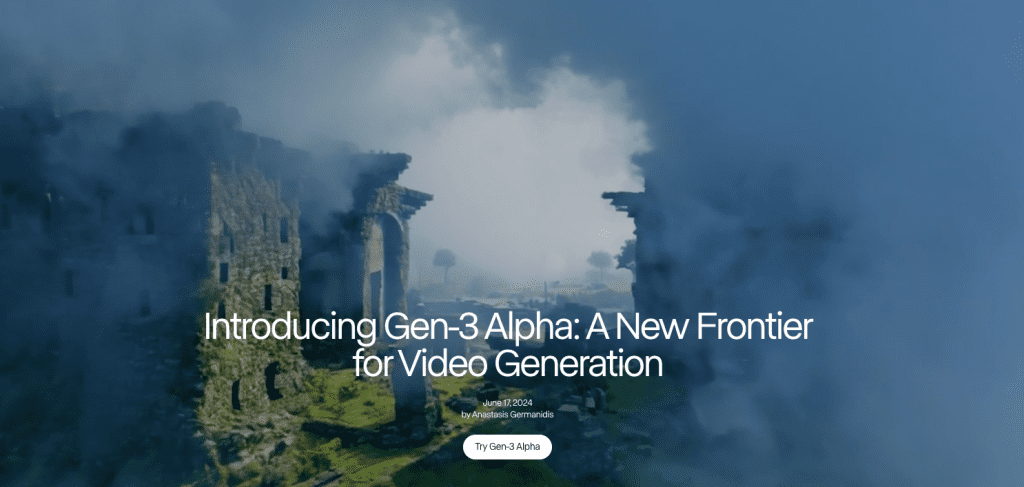
It’s like having a junior editor who reads your script and tries to visualize it for you. The AI interprets your words, matches them to stock footage or generated visuals, adds transitions, and spits out a timeline. These text-to-video models have evolved dramatically since the early 2020s, when basic versions first appeared. When I first tested Runway’s Gen-3 Alpha in late 2024, it could generate coherent 10-second clips from text prompts, but full script-to-video tools in 2025 go further — they handle multi-scene narratives now.
The appeal? Speed. I can go from “here’s my idea” to “here’s a rough cut” in under 20 minutes. For creators drowning in deadlines or testing concepts before committing to full production, that’s huge.
How AI Converts Script to Video Automatically
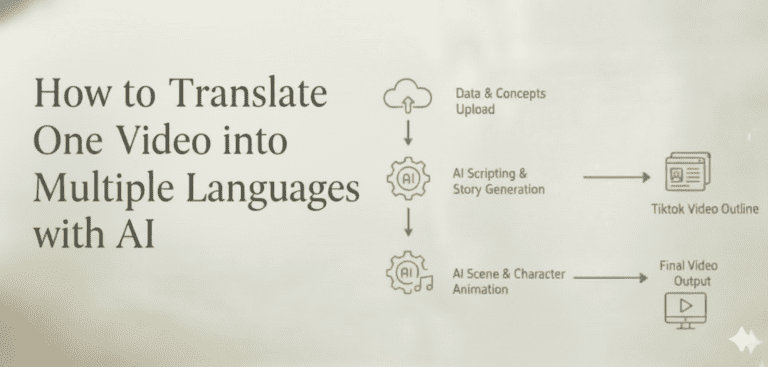
AI Script-to-Video Workflow Overview
When I paste a script into a tool like Pictory, InVideo AI, or Synthesia, here’s what happens behind the scenes:
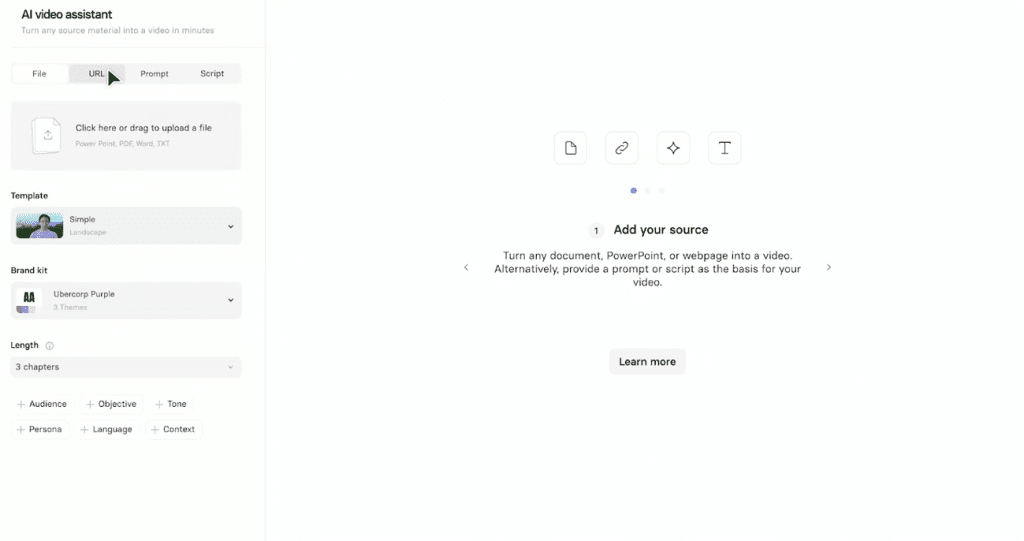
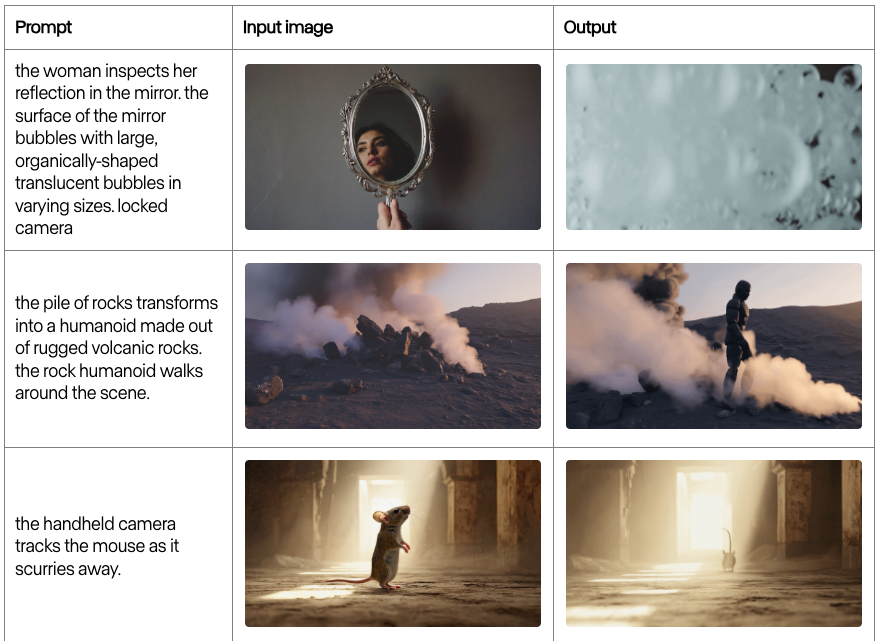
Text Analysis — The AI reads my script and breaks it into logical scenes. If I write “A woman walks through a busy city street at sunset,” it identifies the subject (woman), action (walking), setting (city street), and mood (sunset). It’s parsing meaning, not just keywords.
Visual Matching — Next, it searches its library — stock footage, AI-generated clips, or both — for visuals that match each scene. I’ve noticed tools like InVideo AI pull heavily from stock libraries like Storyblocks, while others like Runway generate clips from scratch. The difference shows. Stock-based tools give you polished, real-world footage but sometimes feel generic. Generated clips can be more unique, but occasionally… weird. Like, “why is that coffee cup floating” weird.
Scene Assembly — The AI stitches scenes together based on pacing cues in the script. If I write short sentences, it tends to create quick cuts. Longer descriptions usually mean slower, more cinematic transitions. I didn’t expect this level of interpretation, but it’s there.
Audio Sync — Most tools add AI voiceover automatically, syncing it to the visuals. Some let me upload my own voice, which I prefer, because AI voices still have that slight uncanny quality. Background music gets layered in too, usually picked based on the tone it detects in my script.
The whole process takes 5-15 minutes depending on script length. For a 90-second video, I’m usually look at about 8 minutes of processing time.
Step-by-Step Script to Video Workflow
From Script Input to Final Video Export
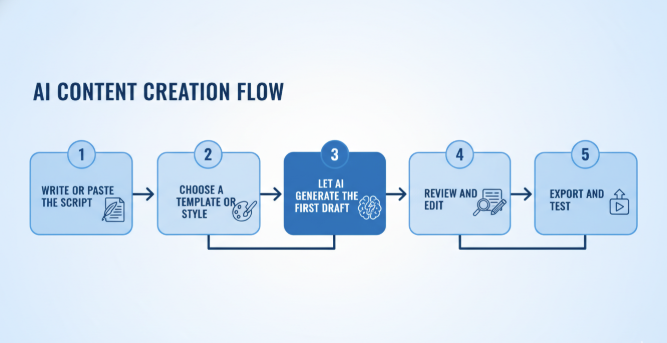
Here’s exactly how I approach it now after testing this workflow about 20 times:
1. Write or paste the script — I keep it simple. Clear scene descriptions. “Woman coding at a desk, golden hour light through window.” Not “Woman engaged in productive digital work.” The AI doesn’t understand vibe like a human DP does, so I describe what I literally want to see.
2. Choose a template or style — Most tools offer presets: corporate, social media, documentary, etc. I usually start with “social media” because it defaults to vertical format and faster pacing, which I can slow down later if needed.
3. Let AI generate the first draft — I hit generate and go make coffee. Seriously. Don’t sit there watching the progress bar. It takes a few minutes and staring doesn’t help.
4. Review and edit — This is where the real work happens. The first output is never perfect. Maybe the AI used a beach scene when I meant a lake. Or it picked a corporate-sounding voiceover when I wanted something warmer. I swap clips, adjust timing, sometimes re-write parts of the script to get better visual matches. Recent research shows that 86% of global creators now use generative AI tools in their workflow, though most spend significant time refining outputs rather than using them as-is.
5. Export and test — I export a draft, watch it on my phone (because that’s where most people will see it), and note what feels off. Usually it’s pacing. AI tends to rush through emotional moments.
Tips for Better Script to Video Results
Prompt Structure Tips for Cleaner Video Output
After burning through probably 30+ script iterations, here’s what actually works:
Be specific about subjects — “A red car” beats “a vehicle” every time. The AI has less room to misinterpret.
Separate scene descriptions from dialogue — I use line breaks or brackets. Like: [Scene: Coffee shop, morning light] "I never expected this project to take off." The AI reads these differently and it helps with scene segmentation.
Mention camera angles — Writing “close-up of hands typing” gives me way better results than just “person working.” The AI understands basic cinematography terms: wide shot, close-up, over-the-shoulder, etc. Runway’s official prompting guide emphasizes that specific camera direction dramatically improves output quality.
Keep it under 150 words per scene — I’ve noticed that when I write long, flowing paragraphs, the AI gets confused about where one scene ends and another begins. Short chunks work better.
Visual Pacing and Scene Consistency Tips
Match sentence length to desired pace — Short sentences = quick cuts. Long sentences = slower, more contemplative footage. It’s not perfect, but the AI does pick up on rhythm.
Repeat visual keywords for consistency — If I want a character to appear in multiple scenes, I mention “same woman from earlier” or use a name. Otherwise the AI might give me different people, which breaks continuity completely.
Avoid sudden tone shifts — Going from “chaotic city traffic” to “peaceful meditation room” in consecutive scenes confuses the AI. It’ll give you weird transitional footage or jarring cuts. If I need contrast, I add a neutral scene in between.
Use timestamps or “meanwhile” for parallel action — If my script has two things happening simultaneously, I clarify: “Meanwhile, back at the office…” The AI usually interprets this as a separate scene thread.
One frustrating thing: AI still struggles with specific objects or brands. I can’t say “iPhone 15” and expect it to show that exact phone. I get generic smartphones. So I’ve learned to describe function instead: “modern touchscreen phone with large display.”
When to Use Script to Video in Real Projects
Best Use Cases for AI Script-to-Video Tools
I don’t use script-to-video for everything. It’s not a magic bullet. But it’s legitimately useful in these scenarios:
Concept testing — Before I commit to a full shoot, I’ll run the script through AI to see if the visual flow makes sense. It’s like a moving storyboard. Saved me from a few bad ideas. For even more control over visual planning, I sometimes generate storyboard sketches before feeding them into the script-to-video workflow.
Social mediacontent at scale — When I need 5-10 short videos for different platforms with similar messaging, script-to-video gets me 80% there. I tweak the final 20% manually, but that’s way faster than starting from scratch each time. Industry data shows that 51% of video marketers now use AI for creation and editing, particularly for high-volume content.
Explainer videos and tutorials — For straightforward educational content where I’m explaining a process, AI-generated visuals work really well. I don’t need cinematic perfection; I need clarity. Tools like Synthesia excel at this, particularly for corporate training videos where consistency matters more than artistic flair.
Client pitch videos — Sometimes a client needs to see something before approving budget for a real production. A script-to-video draft gives them enough to greenlight the project without me investing unpaid hours into manual editing.
When NOT to use it: emotional storytelling that needs human nuance, anything requiring specific locations or real people, content where brand consistency is critical (AI is inconsistent with colors, fonts, logos), or projects where you have time to do it right manually. AI gives you speed, not soul.
Final Thoughts on Using Script to Video in 2025
I’m still using script-to-video tools, probably 2-3 times a week now. But I’ve stopped expecting them to replace my editing workflow entirely. They’re more like a really fast assistant who gets the boring stuff done so I can focus on the parts that actually need a human touch.
The tech has gotten noticeably better even in the past six months. Fewer weird visual glitches, better audio sync, smarter scene interpretation. But it’s still not perfect, and honestly? I’m okay with that. Perfect would be boring. What I want is useful, and script-to-video has hit that mark.
If you’re drowning in content deadlines or just want to test ideas faster, try it. Start with a simple script, something low-stakes. See what it gives you. Then decide if the speed trade-off is worth it for your workflow.
I’ll keep testing these tools as they evolve — partly because it’s genuinely helpful for my work, and partly because I’m just too curious not to.
Want to try script-to-video yourself? I’ve been testing CrePal lately for quick projects — it’s free to start and honestly easier than most tools I’ve tried. Paste a script at Crepal and watch it build a rough cut in minutes. Low-stakes way to test if it’s your new assistant.
Previous posts: