This started because I had a moody portrait sitting in my camera roll that deserved… movement. I kept seeing ai image to video animation demos flying around, so I gave myself a weekend to test a few tools and see if any of them could turn a still into a clip I’d actually post. If you’re wondering whether image-to-video AI can help your workflow without making everything look like a jelly filter, same. Here’s what I found, mess-ups included.
Why AI Image-to-Video 2025
Animation Trends
I’m noticing two big shifts this year. First, the jump in motion realism. Depth estimation and diffusion models got better at respecting edges, hair, fingers, accessories don’t wobble as much. Faces still can go uncanny if you push expressions too far, but light camera moves and environmental motion feel way more believable than last year.
Second, creative control. Instead of “press generate and pray,” tools now expose motion tracks, camera paths, and per-layer masking. You can guide where the movement happens: sky drifts, jacket flutters, background parallax, while the subject stays anchored. If you create social content, that means your brand style can survive the AI.
Tool Ecosystem
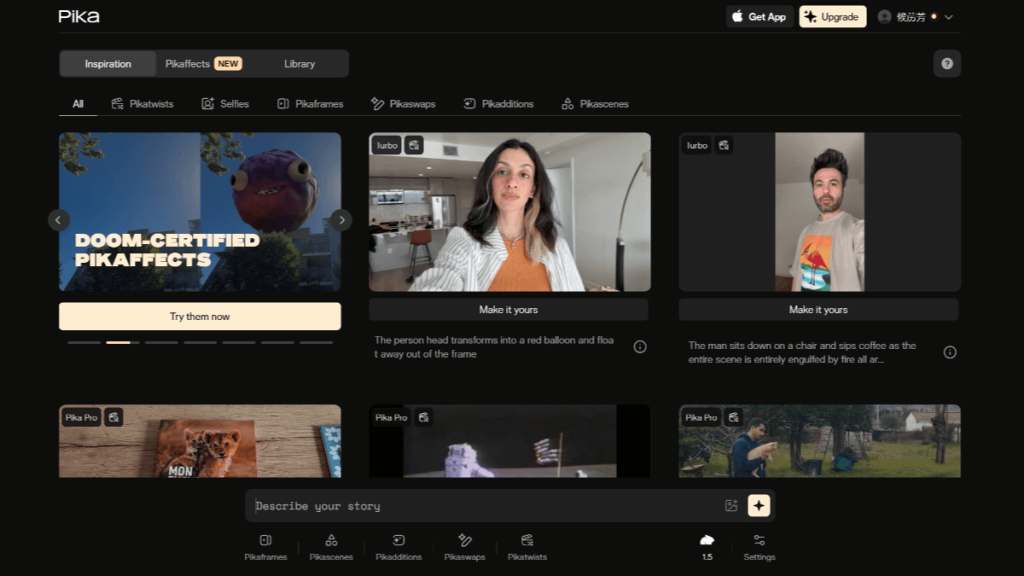
The big names I bumped into: Runway (Gen-3 era), Pika, and Kaiber. Runway leans into cinematic presets and clean UI. Pika is playful and fast, great for quick iterations. Kaiber shines when you want music-aware motion and stylization. There are niche players (CapCut has an image-to-video filter now, and ComfyUI nodes exist if you like building graphs), but for most people starting out, those three cover 90% of needs.
Animation Workflow

Image Upload Steps
I kept it simple and repeated the same steps across tools:
- Pick the right still: high-res, clean subject separation, and no weird compression. Busy backgrounds can work, but expect more cleanup.
- Aspect ratio first: choose the final canvas before generating. 9:16 for Reels/TikTok, 1:1 for quick posts, 16:9 for YouTube intros. Changing later can squash your subject.
- Content safety and rights: obvious, but worth saying, use images you own or have rights to. Some tools flag faces or brand logos: saves time to check upfront.
- Upload, then frame: I crop the focal point slightly off-center (rule-of-thirds-ish). A tiny off-center crop makes subtle pans feel more natural.
Small note: If the tool offers “enhance details” on import, I toggle it on for textures (fabric, foliage), off for skin. Over-sharpened faces look crunchy.
Motion Settings
Here’s where I messed up first. I cranked “intensity” to see drama and got a haunted oil painting vibe. What worked better:
- Duration: 3–5 seconds for social loops. Long enough to feel intentional, short enough to hide minor artifacts.
- Camera: start with a 5–10% push-in or a gentle pan. Add a touch of parallax (background moves slightly slower than foreground). This sells the depth.
- Subject lock/masking: if available, mask the main face or logo to reduce drift. I feather the mask edges to avoid cutout vibes.
- Motion sources: let skies, water, hair tips, fabric edges move. Keep eyes and core facial structure still unless you want stylized results.
- Seed and variability: if you get a near-miss, don’t redo everything, lock the seed and tweak one parameter at a time. Saves sanity.
- Frame rate: 24 fps looks cinematic: 30 fps feels snappier on social. I export 1080×1920 at 24 fps for most posts and upscale only if needed.
If the tool offers “structure” or “edge fidelity,” I slide it higher when I care about preserving lines (architecture, type) and lower when I want dreamy motion (clouds, bokeh).
Tool Comparison
Runway vs Pika
I ran the same portrait through both.
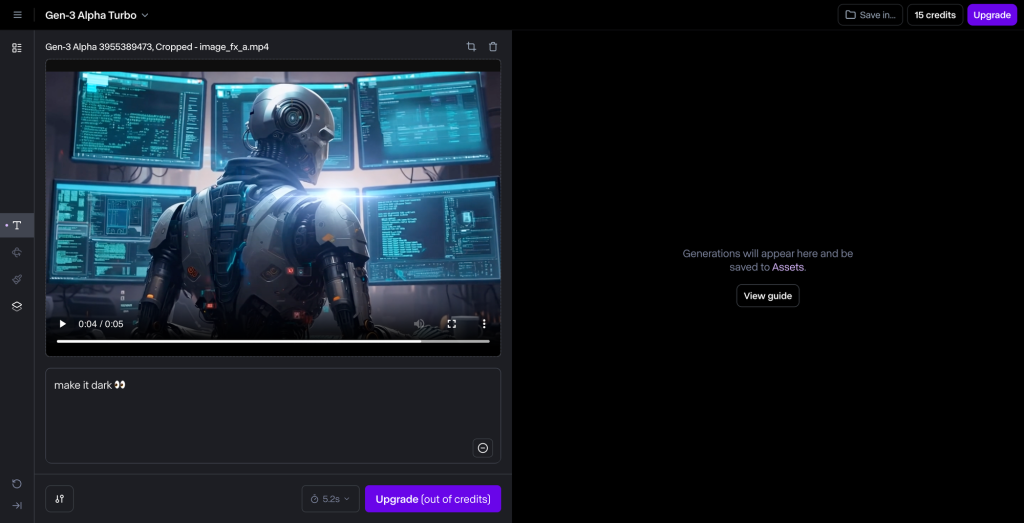
- Runway: The Gen-3 presets are surprisingly tasteful. The “subtle dolly” gave me clean parallax with minimal face distortion. Masking was straightforward, and export was painless. Downsides: heavier renders take longer, and some advanced toggles live behind a tidy UI, less tinkering, more guardrails. If you like predictable results for client work, this is comforting.
- Pika: Faster previews. I liked the slider granularity, felt like I could dial in motion intensity with more nuance. But, when I pushed motion on hair and background at the same time, I got a slight warp near the ears. Easy to fix by lowering intensity or adding a subject lock, but worth noting. Great for experimentation and meme-y edits because iteration is quick.
Verdict: Runway for polish and consistency: Pika for speed and playful control. If you’re doing paid ads or brand visuals, I’d start in Runway. For quick drafts or ideation, Pika is fun.
Kaiber Music Sync
I underestimated this. Kaiber‘s music sync actually listens to beats and suggests motion pulses. I imported a moody lo-fi track, and the camera micro-zooms landed near downbeats with zero manual keyframing. Is it perfect? Not always, the algorithm sometimes over-emphasizes kicks and ignores softer transitions, but as a first pass, it’s miles ahead of eyeballing.
Tip: Keep motion intensity low when using beat sync. Let the rhythm guide small moves (pulses, micro-tilts) instead of big swings. Then add one accent move (like a quick rack-focus effect) before the chorus/drop. It sells the sync without screaming “auto.”
Case Study
Social Media Clip Example
I took a still portrait, cool-toned window light, jacket detail, and aimed for a 6-second vertical loop.
- Tool: Started in Runway for the base motion. Subtle push-in, background parallax, face masked. Exported at 1080×1920, 24 fps.
- Pass 2: Dropped into Kaiber to test music sync with a chill beat. I kept the intensity at 0.2 and added a single accent zoom on the snare lead-in.
- Cleanup: Quick pass in CapCut for color (tiny S-curve, lifted shadows) and caption sticker. I also trimmed the first half-second to jump right into the motion, people scroll fast.
Result: The clip felt intentional instead of “AI-ified.” No jelly cheeks, jacket had a crisp flutter, and the window highlights breathed just enough. When I posted, it got more saves than my usual stills and held attention better in the first two seconds, which is usually the drop-off zone for me. Not a viral miracle, just solid.
If you try something similar, start with a clean subject lock and pick one motion hero, either camera or environment. When both are loud, the illusion breaks.
Quick pitfalls I hit:
- Overlong clips. Anything over 8 seconds exposed tiny artifacts.
- Over-sharpening skin. I keep facial retouch minimal, then sharpen just textures (hair/fabric).
- Ignoring aspect ratio first. Reframing after the fact messed with the parallax.
Who should try ai image to video animation? If you draft social promos, YouTube hooks, or album art teasers, it’s worth it. If you want full character animation or lip-sync from a single image, we’re not there yet without heavy cleanup.
My take: If you need clean, repeatable results, Runway is a safe first stop. If you’re experimenting or making trend clips, Pika feels quicker. If music is central, Kaiber’s sync earns its keep. And if you’re like me and just want a still to feel alive without looking like a screensaver, keep the motion small, lock the face, and let the background breathe.
Previous posts: