Hi guys, I’m Dora. Last week I sat staring at a 512×768 LTX 2.3 output thinking it was almost perfect — the motion was clean, the composition worked — but it looked genuinely soft at anything larger than a phone screen. I knew the upscalers existed. I’d been putting off learning them because ComfyUI intimidates me whenever I have to wire up a two-stage pipeline from scratch.
So I blocked off an afternoon, read through the official docs, broke things about four times, and finally got a setup that works reliably. This guide is that afternoon compressed into something you can actually follow.
What the LTX 2.3 Upscaler Does (Spatial vs Temporal — What Each Fixes)
LTX 2.3 ships with two separate upscaler checkpoints that solve two completely different problems. The spatial upscalers allow creators to generate at a manageable resolution and scale up afterward, while the temporal upscaler doubles the frame rate of existing clips. Used together, they make high-resolution, high-frame-rate output genuinely accessible on consumer hardware — which wasn’t really true before this release.
Spatial upscaler (ltx-2.3-spatial-upscaler-x2-1.0.safetensors) — takes your generated latent and doubles the spatial resolution. If you generated at 512×768, it upscales to 1024×1536 while working entirely in the latent space, before VAE decode. This means it’s not just stretching pixels — it’s adding detail that the generation pass established but didn’t render at full fidelity.
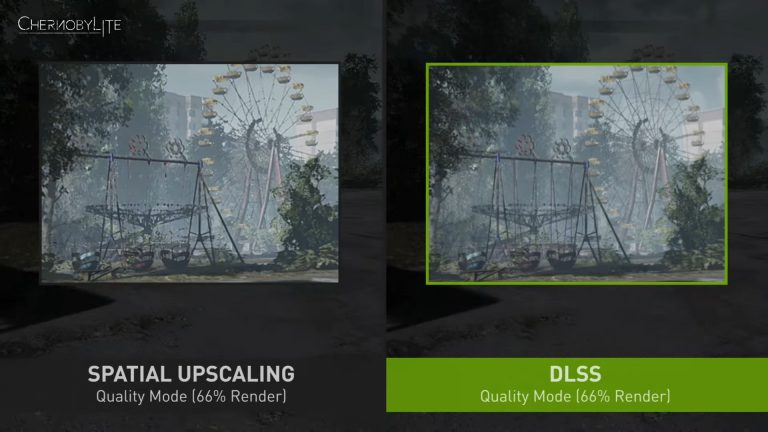
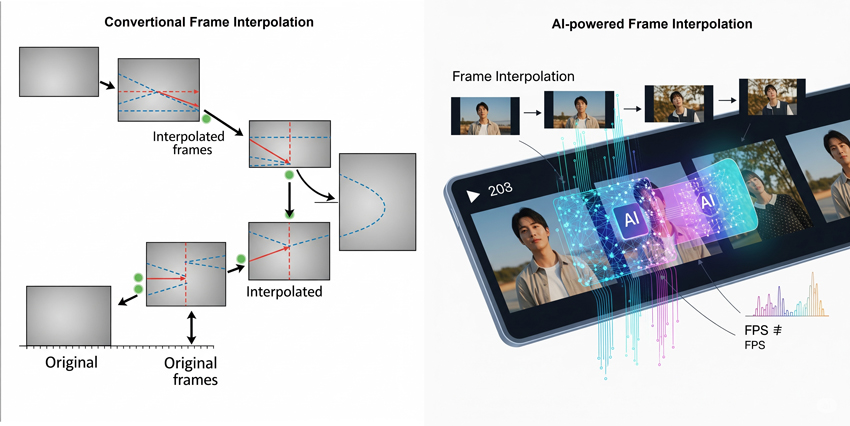
Temporal upscaler (ltx-2.3-temporal-upscaler.safetensors) — doubles frame rate in the latent space. Generate at 24fps, get 48fps output. The temporal upscaler increases frame rate directly in the latent space, allowing creators to scale videos to higher FPS without regenerating the entire sequence. This is a much better result than RIFE-style interpolation, which guesses intermediate frames from pixels — the LTX temporal upscaler understands the motion structure of the generation itself.
The key insight: you don’t have to run both every time. Spatial alone is the most common use case. Temporal matters most for motion-heavy content where 24fps looks choppy.
When to Use the Upscaler vs Generating at Full Res Natively
This tripped me up at first. Why not just generate at 1080p from the start?
The honest answer: you can, and sometimes you should. But generating at half resolution in Stage 1 and upscaling in Stage 2 gives you a meaningful workflow advantage — you get to preview motion, composition, and prompt adherence at low cost before committing to a full-resolution pass. Most creators prefer to generate smaller, faster previews first, and then upscale them — today’s upscalers take minutes to upscale a 10-second clip into 4K resolution.
The practical rule I follow:
| Scenario | Approach |
| Quick iteration, testing prompt | Generate at 512×768, no upscaler |
| Reviewing motion quality | Add spatial upscaler after motion looks right |
| Final delivery, social/web | Full two-stage with spatial upscaler |
| Cinematic output, slow motion | Add temporal upscaler on top of spatial |
| Very short clip (<5s), time-sensitive | Generate full-res natively |
The spatial upscaler adds significant VRAM overhead (more on that below), so it’s not worth running on every draft. Wait until the generation is worth upscaling.

How to Add the Upscaler to Your ComfyUI Workflow (Step-by-Step)
Before you start: make sure you’re on a recent ComfyUI nightly build, since LTX 2.3 nodes require it. If nodes are missing when loading a workflow, your ComfyUI version may be outdated — the Desktop version auto-updates when a new stable release is available.
Step 1: Download the upscaler checkpoints
Both upscaler files are hosted on Hugging Face — Lightricks/LTX-2.3. Download:
ltx-2.3-spatial-upscaler-x2-1.0.safetensorsltx-2.3-temporal-upscaler.safetensors
Place both files in your COMFYUI_ROOT_FOLDER/models/latent_upscale_models folder — not checkpoints, not loras. That folder specifically.
Your model directory should look like this:
ComfyUI/
├── models/
│   ├── latent_upscale_models/
│   │   ├── ltx-2.3-spatial-upscaler-x2-1.0.safetensors
│   │   └── ltx-2.3-temporal-upscaler.safetensors
│   ├── checkpoints/
│   │   └── ltx-2.3-22b-dev-fp8.safetensors
│   ├── loras/
│   │   └── ltx-2.3-22b-distilled-lora-384.safetensors
│   └── text_encoders/
│       └── gemma_3_12B_it_fp4_mixed.safetensors
Step 2: Install the LTX ComfyUI custom nodes
Open ComfyUI Manager → search “LTXVideo” → install ComfyUI-LTXVideo. Restart ComfyUI. The nodes appear under the LTXVideo category in your node menu. You can also install via the official ComfyUI-LTXVideo GitHub repository if you prefer manual setup.
Step 3: Load the two-stage workflow template
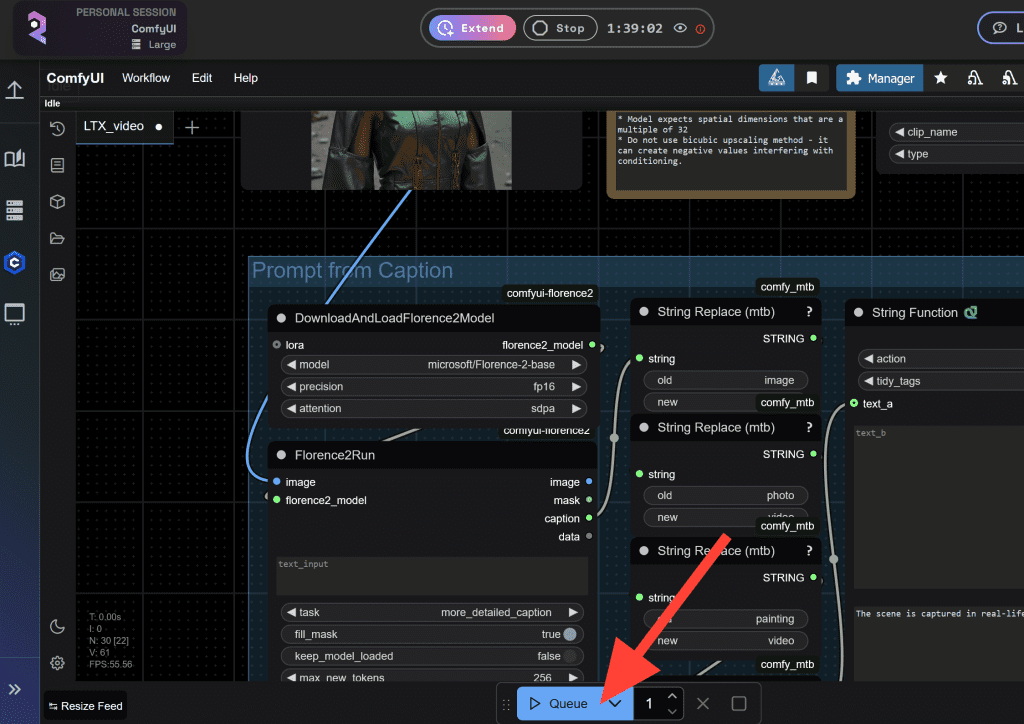
In ComfyUI, open the Workflow Templates browser. You’ll find the official LTX 2.3 T2V and I2V workflows pre-built with the two-stage pipeline. Load one, verify your model paths, hit Queue Prompt. The structure: Stage 1 generates at half resolution → spatial upscaler node doubles it → Stage 2 refinement pass → decode.
Spatial Upscaler Settings
The spatial upscaler node (LTXVLatentUpsampler) takes your Stage 1 latent output and runs the upscale. Key parameters:
upscale_factor: 2.0          # Fixed at 2x — don't change this
denoise_strength: 0.35–0.55  # Lower = preserves more Stage 1 detail
                             # Higher = adds more new detail but risks drift
steps: 4–8                   # Using distilled-lora, 4 steps is usually enough
cfg: 1.0                     # Required when using distilled-lora
The denoise_strength is the main dial. I run 0.40 as a default and go up only if the output looks too soft. Going above 0.55 tends to introduce identity drift — faces look slightly different from Stage 1.
Think of upscale refinement as something like Hires.fix in other models. The workflow runs in 3 steps, with CFG set to 1.0 when using distilled-lora — it behaves somewhat like denoise ≈ 0.47 in simpler terms.
Temporal Upscaler Settings
The temporal upscaler sits after the spatial pass in the node chain. It takes the upscaled latent and doubles frames:
# Temporal upscaler node — LTXVTemporalUpsampler
input: output_latent from spatial upscaler (or Stage 1 if spatial skipped)
frame_rate_multiplier: 2x    # Fixed
# No additional parameters to tune — it's a pass-through upscale in latent space
Important: the temporal upscaler works best on clips with genuine motion. On static or nearly-static scenes, it can introduce subtle flickering. Test with a short clip before running on full-length output.
Quality Results and Artifacts to Watch For
After testing the two-stage pipeline across about 40 clips in March 2026, here’s what I see most consistently:
Where it works well: Landscape shots, architectural subjects, smooth camera motion, talking-head clips. The spatial upscaler recovers texture and edge detail cleanly in these cases — hair strands, fabric grain, background depth all improve noticeably over unupscaled output.
Spatial artifacts to watch for:
- Denoising too high (>0.55): Subject face or body proportions can shift subtly between Stage 1 and Stage 2. If a character’s face looks “slightly off” in the final output, lower denoise_strength first.
- Final-frame bright flash: This is a known issue with some upscaler workflows — community workarounds include trying the x1.5 upscaler instead of x2, updating sigma and preprocess settings to match newer workflows, or trimming the final frames as a temporary fix.
- Unwanted text overlays: Reported in some upscaler workflow versions — use the latest official workflow from the repo to avoid this.
Temporal artifacts to watch for:
- Flickering on static backgrounds when temporal upscaler is applied to low-motion clips
- Slight motion blur on fast movement — the temporal upscaler interpolates frames, so very fast action can blur at the interpolated frames
VRAM Impact of Enabling the Upscaler
This is where most people run into trouble. The upscaler is a second model loaded on top of your main checkpoint, and it runs a full sampling pass.
Rough VRAM requirements by configuration:
| Configuration | Approx. VRAM needed |
| Stage 1 only, 512×768, 24fps, 80 frames | ~10–12 GB |
| Stage 1 + Spatial upscaler, same clip | ~16–20 GB |
| Stage 1 + Spatial + Temporal, same clip | ~20–24 GB |
| 1080p output with both upscalers, 200+ frames | 24 GB+ (OOM risk on 16 GB) |
At 1080p above 200 frames, when the progress moves from first sampling to the second sampling (upscale 2x step), VRAM usage shoots up and can cause OOM — even on 16 GB setups with --novram flags.
Low VRAM options:
If you’re on 12–16 GB, use the fp8 checkpoint for Stage 1 and add --reserve-vram 5 to your ComfyUI launch flags. For systems with low VRAM, use the model loader nodes from low_vram_loaders.py, and pass --reserve-vram 5 (or another number in GB) as a ComfyUI parameter. For even tighter setups, the GGUF Q4 quantized variants bring the main model footprint to around 18 GB total including the upscaler, and Q3 variants can run in 12 GB for the generation stage.
NVIDIA’s FP8 and NVFP4 checkpoints deliver up to 2.5x performance gains and 60% lower memory usage on RTX 50 Series GPUs — if you’re on newer hardware, these formats are worth switching to before adjusting any other settings.
Tips for Best Upscaling Results
These are what actually moved the needle for me after two weeks of testing:
- Generate at exactly half your target resolution. If you want 1024×576 output, generate Stage 1 at 512×288. The spatial upscaler is a 2x model — off-ratio inputs produce inconsistent results. Width and height settings must be divisible by 32.
- Use the distilled-lora for Stage 2, not the devcheckpoint. The distilled pass runs in 4–8 steps and maintains consistency with Stage 1 better than running the full dev model again.
- Keep Stage 1 denoise at 0.35–0.45 for faces. Faces are the most sensitive area. Higher denoise values cause subtle identity drift that’s hard to unsee once you notice it.
- Don’t mix LTX 2.0 assets into a 2.3 pipeline. Many issues — OOM errors, GGUF size mismatches, embeddings connector errors — are caused by version mismatches between checkpoints, connectors, text encoders, upscalers, and custom nodes. The safest approach is to use a fully matched LTX 2.3 workflow.
- Use
LTXVPreprocessbefore image-to-video Stage 2 input. This intentionally degrades the frame slightly to look like video compression, which helps the Stage 2 pass blend the upscaled output more naturally.

Limitations
The two-stage pipeline is powerful, but worth knowing its real constraints before you commit it to a production workflow.
Not a fix for bad generations. The spatial upscaler sharpens and refines — it doesn’t correct structural problems from Stage 1. If your subject has wrong proportions, a broken hand, or inconsistent lighting in the base generation, upscaling will faithfully render those problems at higher resolution. Fix the generation first.
Long clips need serious VRAM. Clips over 200 frames at 1080p push even 24 GB setups into risky territory. For longer-form output, generate in shorter segments and stitch, or stay at 720p.
Temporal upscaler isn’t universal. Compared to RIFE interpolation, the LTX temporal upscaler does a much better job — the animation is smooth, where RIFE can feel choppy. However, denoising should not go above 0.15, otherwise you run into blur, distortion, and artifact issues.
The pipeline is still maturing. LTX 2.3 dropped in early March 2026 and the community is still ironing out edge cases. Stick to official workflows from docs.ltx.video until known issues get patched in subsequent updates.
FAQ
Q: Do I need both the spatial and temporal upscaler, or can I use just one?
A: You can use either independently. Spatial upscaling is the most common use case — it improves resolution and detail on every clip. The temporal upscaler is optional and mainly useful for motion-heavy content where you want smoother playback. Most creators run spatial only and add temporal selectively.
Q: What’s the minimum VRAM to run the LTX 2.3 upscaler?
A: For the spatial upscaler in a two-stage pipeline at 1024×576, plan for at least 16 GB VRAM with the fp8 checkpoint and --reserve-vram 5 launch flag. For 1080p output with both upscalers, 24 GB is the comfortable floor. GGUF Q4 variants extend usability down to 12–16 GB with trade-offs in generation quality.
Q: Where do I find the official reference workflows for the two-stage pipeline?
A: The official workflows are available in ComfyUI’s Workflow Template browser (search “LTX”) and in the ComfyUI-LTXVideo GitHub repository under example_workflows/.
Previous Posts: