Hi. I’m Dora. A friend dropped a video in our group chat — no caption, no source, just a clip of a city skyline during what looked like a protest. Everyone was sharing it like it was breaking news. Something felt off about the timestamp. I sat there thinking, wait, where is this actually from?
That one clip sent me down a rabbit hole I wasn’t expecting. Turns out, tracking down the original source of any video is both totally doable and wildly misunderstood. Most people either don’t know the tools exist, or they’re using them wrong. So let me walk you through the whole thing — the tools, the process, the tricks, and where these methods honestly fall short.

What Reverse Video Search Actually Does (vs. Image Search)
Here’s the thing that confused me at first: reverse video search and reverse image search are not the same thing, even though they’re closely related.
Reverse image search takes a still photo and finds other places that exact image appears online. It’s been around for years and works well for photos.
Reverse video search is trickier. No major search engine lets you drag-and-drop a full MP4 file and get an instant “here’s the original source” result — not reliably. What actually happens under the hood is keyframe extraction. The tool pulls visually distinctive frames from your clip, then runs those frames through a visual matching database. Think of it as reverse image search applied to individual moments inside a video.
Why does this matter? Because video introduces compression, re-encoding, filters, and platform crops. A clip that’s been screen-recorded, resized for TikTok, and re-uploaded three times looks visually different to an algorithm than the master file. The matching is never perfect. But with the right frame, the right tool, and a couple of backup strategies — it works more often than you’d think.
The Best Reverse Video Search Tools in 2026
Let me be upfront: I’ve tested all of these myself. Some surprised me, some disappointed me, and one completely changed how I approach video verification.
Google Lens is the starting point for most people, and for good reason. In Chrome, you can right-click any paused video frame directly on a webpage and select “Search image with Google Lens” — no screenshot needed. Google’s index is unmatched in size, which often matters more than any algorithm advantage. On mobile, the Google app handles the same task in a few taps. It’s fast, requires no signup, and catches the obvious stuff immediately.
Yandex Images is the one most people sleep on. I ran the same frame through Google and Yandex on the same clip, and Yandex found the original source when Google came up empty. It’s particularly strong at facial recognition and content that originated outside North American platforms before going viral. Don’t skip this step.
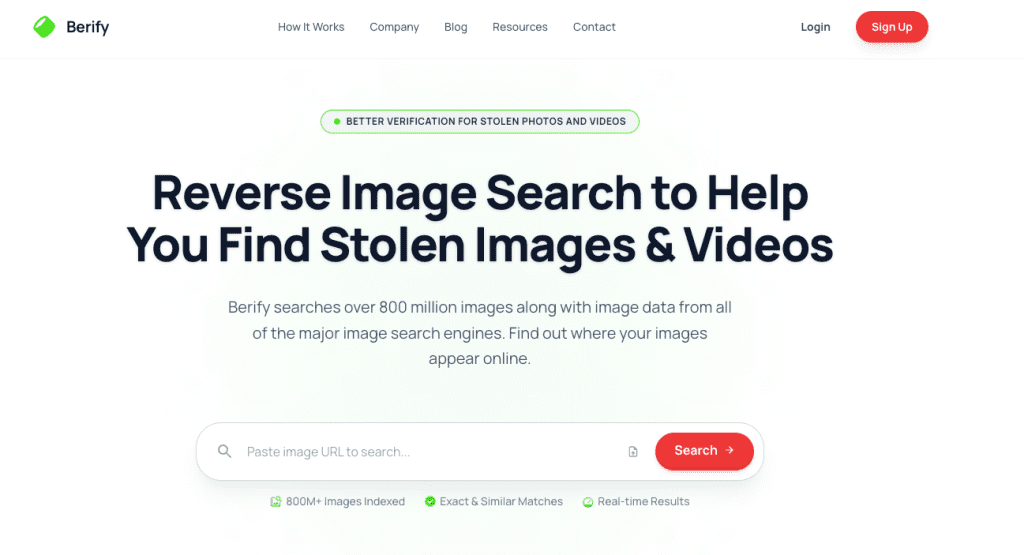
Berify is designed specifically for creators protecting their content. It simultaneously runs your screenshot through Google, Bing, Yandex, and its own proprietary database — over 800 million images — and can monitor your content on an ongoing basis, alerting you when a new match appears. The free tier allows a handful of searches; paid plans start around $5.95/month.
TinEye specializes in exact and near-exact pixel matching. It’s genuinely excellent for finding the earliest indexed version of an image online, which helps you establish timeline when you’re trying to prove something predates a certain event. Free for casual use; the API tier serves bulk professional use cases.
InVID/WeVerify is the professional-grade option. It’s a browser extension used by journalists, fact-checkers, and human rights investigators worldwide. You paste a video URL and it automatically fragments the clip into keyframes, runs each frame through multiple search engines simultaneously, extracts metadata, and can even flag potential deepfakes. The Poynter Institute, home of the International Fact-Checking Network, has described it as “one of the most powerful tools for spotting misinformation online.” It’s free to install, with some advanced features restricted to registered journalists and researchers.

Free vs. Paid Options — What You Actually Get
Here’s the honest comparison table you need before committing to anything:
| Tool | Free Tier | Paid Tier | Best For |
| Google Lens | ✅ Unlimited | — | Quick everyday lookups |
| Yandex Images | ✅ Unlimited | — | Non-English content, facial matches |
| TinEye | ✅ Limited searches | API from ~$200/mo | Earliest-upload timeline research |
| Berify | ✅ 5 free searches | From ~$5.95/mo | Creator copyright monitoring |
| InVID/WeVerify | ✅ Core tools free | Advanced features need registration | Journalism, deepfake detection |
| Bing Visual Search | ✅ Unlimited | — | Secondary cross-check |
Bottom line: For 90% of what creators and casual users need, the free tools are genuinely enough. If you’re running a channel with original content that regularly gets ripped off, Berify’s monitoring alerts pay for themselves quickly. If you’re doing journalistic verification, InVID/WeVerify is the non-negotiable choice.
Step-by-Step: How to Search by Video Clip or Screenshot
This is the part where most people go wrong. The process isn’t complicated, but the details matter.
Step 1 — Pick the right frame. Don’t grab the opening shot — it’s often a fade-in or black screen. Look for a moment with visually distinctive elements: a recognizable face, a landmark, visible text, a brand logo, or a unique object in the scene. The more unique the frame, the better your match rate.
Step 2 — Take a clean screenshot. On Mac: Cmd + Shift + 4 to select the area. On Windows: Shift + Win + S. Crop out the player UI, any watermarks, and platform overlays (TikTok username bars, Instagram sticker layers). That interface chrome is visual noise that pulls the algorithm’s attention away from the actual content.
Step 3 — Run Google Lens first. Go to images.google.com, click the camera icon, and upload your screenshot. Or right-click a paused video frame in Chrome and select “Search image with Google Lens.” Check the “Find image source” section of results and look for the cleanest, highest-resolution, earliest-dated version.
Step 4 — Run Yandex second. Go to yandex.com/images, click the camera icon, upload the same screenshot. You’ll frequently get different — sometimes better — results.
Step 5 — Verify critically. A result showing your image doesn’t mean you’ve found the source. That could be another re-upload. Look for the highest resolution version, the original aspect ratio (not cropped for Reels or TikTok), and the earliest upload timestamp. Those three signals point to the master file.
The Frame-Grab Trick That Works When Video Upload Fails
This one genuinely surprised me when I first tried it.
Some re-uploaders flip video horizontally specifically to evade automated copyright detection systems. If your reverse search returns nothing, try mirroring your screenshot before running the search again. On Mac, open the screenshot in Preview → Tools → Flip Horizontal. Run it through search. This bypasses one of the most common evasion tricks.
Second trick: if a single frame search fails, try three different frames from different moments in the clip. Each frame has a different visual fingerprint. A shot from the middle of the clip often matches better than a thumbnail frame that’s been used as a preview across dozens of re-uploads and has therefore become generic to the algorithm.
Use Cases: Fact-Checking, Copyright, Content Research
Fact-checking viral clips. A video appears claiming to show a recent event, but the framing feels off. Running a few frames through Google Lens and Yandex often surfaces the original upload context — and sometimes reveals the clip is years old, from a different country, or completely unrelated to what it’s being used to illustrate. Tools like InVID/WeVerify were built precisely for this workflow, letting journalists cross-check frames across multiple search engines in a single session.
Copyright monitoring. You made something, it got stolen, and it’s now living on 12 other accounts with someone else’s watermark. Running your own content through Berify on a regular basis — or setting up automated monitoring alerts — is genuinely how you catch this early, before the re-uploaded version outranks your original in search. According to Berify, 64% of professional photographers have experienced theft of their work. Video creators face similar rates.
Content research and attribution. You found a clip you want to license or properly credit. Reverse searching gets you to the original creator directly — which is both the ethical move and the smart SEO move if you plan to cite it in your own content.
Deepfake and AI-generated content detection. In 2026, many ethical AI video models embed invisible watermarks. Checking C2PA Content Credentials metadata is the most reliable current method for verifying whether footage is synthetically generated.

Limitations: What These Tools Can’t Find (and Why)
I’d be doing you a disservice if I made this sound like a magic button. Here’s where it genuinely struggles.
Private and walled content is invisible. Content shared inside private Facebook groups, closed Instagram profiles, or encrypted apps like WhatsApp and Telegram has never been indexed by any crawler. There’s no trail to follow. If a video spread through private channels before hitting the public web, you may hit a dead end.
Heavily recompressed content is hard to match. Once a video has been screen-recorded, had a filter applied, been resized for a vertical format, and re-uploaded three times, the visual signature has degraded significantly. The algorithm may not recognize it as the same content.
AI-generated video has no “original source.” Synthetic video from tools like Sora or Veo doesn’t have a creator to trace back to in the traditional sense. You need metadata analysis or C2PA watermark checking for that category.
YouTube has no built-in reverse search. You have to extract a frame manually and use an external tool. YouTube’s Content ID system protects original creators’ uploaded content, but it doesn’t help you find where other people’s content originated.
Tips for Better Results
A few things that actually moved the needle for me:
Try multiple frames, not just one. Different moments in the same clip have different visual signatures. If your first frame fails, try a frame from a different scene entirely.
Add a keyword after uploading in Google Lens. Once your frame is uploaded, you can type a contextual term into the search bar — “news broadcast,” “documentary,” or a location name — to dramatically narrow results.
Check metadata if you have the original file. Video files often contain embedded creation dates, GPS location, and device information. Tools like ExifTool (free, open source) can surface all of this without any upload required. This alone can answer your question in under a minute.
Follow the audio trail. If visual search keeps failing, try identifying the soundtrack using Shazam or SoundHound. Sometimes the music or a specific audio cue leads you back to the original context faster than any image match.
Use the Wayback Machine to check whether an older version of a page featuring the video still exists. If a page was taken down after going viral, the Wayback Machine often has a snapshot that preserves the original upload date and context.
FAQ
Q: Can I upload a full video file to a search engine? Not reliably yet. Most major engines work from still frames. A few specialized tools accept full uploads, but the manual screenshot method is still faster and more accurate for most searches.
Q: What’s the single best free reverse video search tool? Google Lens via Chrome desktop — right-click any paused frame, no screenshot needed. Start there every time.
Q: Why does Yandex sometimes find things Google misses? Different index, different regional coverage. Yandex crawls content originating in Eastern Europe and Russia more thoroughly, and its facial recognition is often superior for certain types of content.
This workflow takes about four minutes once you’ve done it a few times. I run it now any time I want to use a clip I didn’t shoot myself — checking source, timeline, and context before it becomes a problem. It’s one of those habits that feels like overhead until the one time it saves you from publishing something completely out of context.
Previous Posts: