Remember me? I’m your old friend, Dora. Two nights ago, I caught myself doomscrolling sample clips from LTX‑2 at 1:13 a.m. The water splashes looked too good. I shut the tab… then opened it again and said, fine, I’ll try it. This is my field log from that first session and the next morning’s cleanup pass. If you want a fast LTX‑2 quick start without guessing settings, this is the path I’d hand a friend.
Choose your first goal (T2V vs I2V)
Pick one. Don’t try both on your very first run, LTX‑2 is happiest when you’re decisive.
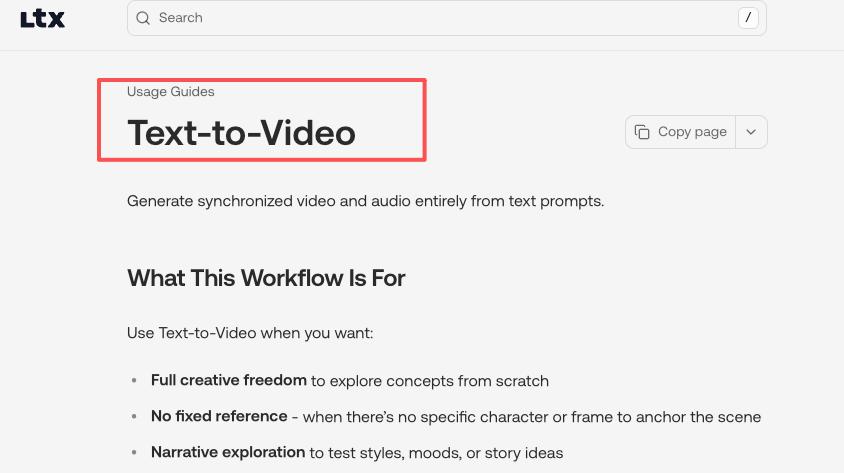
- Text‑to‑Video (T2V): You write a prompt, it generates full motion from scratch. Use this if you’re exploring style, mood, or scenes you don’t have footage for. My first success was “a slow, gliding shot of morning light across a wooden table, dust motes floating.” See the official Text‑to‑Video workflow guide for detailed steps.
- Image‑to‑Video (I2V): You start with a still frame and ask LTX‑2 to animate it. This is great for product shots, logos, and thumbnails. I got more stable motion here on my first try, likely because the model had a strong anchor.
On January 11, I ran both. T2V felt more creative, but also more chaotic in motion continuity. I2V gave me a usable, on‑brand clip faster. If you need a win today, start with I2V.
Minimal setup checklist (what must be ready)
I tested on Windows 11 with an RTX 4090 (24 GB VRAM) and 64 GB RAM. I also tried a 4070 Ti (12 GB VRAM), it worked, but I had to drop resolution you know. At this point I just wanted something to render.
Have these ready before you hit generate:
- GPU with at least 12 GB VRAM. 16–24 GB makes life easier.
- Latest NVIDIA driver (I used 546.xx) and CUDA/cuDNN via your PyTorch install. If you’re on aMac, run via the official cloud/runtime instead of local GPU.
- Python 3.10+ and a fresh virtual environment, or use ComfyUI if you prefer node‑based workflows.
- Storage headroom: a 6–8 second, 720p clip at 24 fps can eat 300–600 MB during temp caching.
- The official LTX‑2 weights and workflow (I pulled from the repo on Jan 11, 2026). Check release notes for model hash to avoid mismatches.

A small tip of mine: If you’re new to this, ComfyUI is the least painful path. Node names match screenshots from the docs, and you can swap encoders/decoders without re‑wiring everything.
Import an official workflow
I learned the hard way: don’t build from scratch at 1 a.m. We should grab the official workflow first, it bakes in the sampler, scheduler, and the recommended pre/post‑processing.
What I did (Jan 11):
- Downloaded the “LTX‑2 Text2Video” and “Image2Video” ComfyUI JSONs from the official repo. Saved into
ComfyUI/custom_nodes/workflows. - Restarted ComfyUI. Both graphs appeared under the Workflow menu.
- In the T2V graph, I only touched three nodes at first: Prompt, Video Length, and Resolution. I left the sampler at the recommended defaults.
If you’re not using ComfyUI, the CLI templates in the docs are fine. Just copy their exact arguments for scheduler, steps, and latent size. Tiny deviations can cause weird motion or memory spikes.
Set 3 key parameters (duration, resolution, steps)
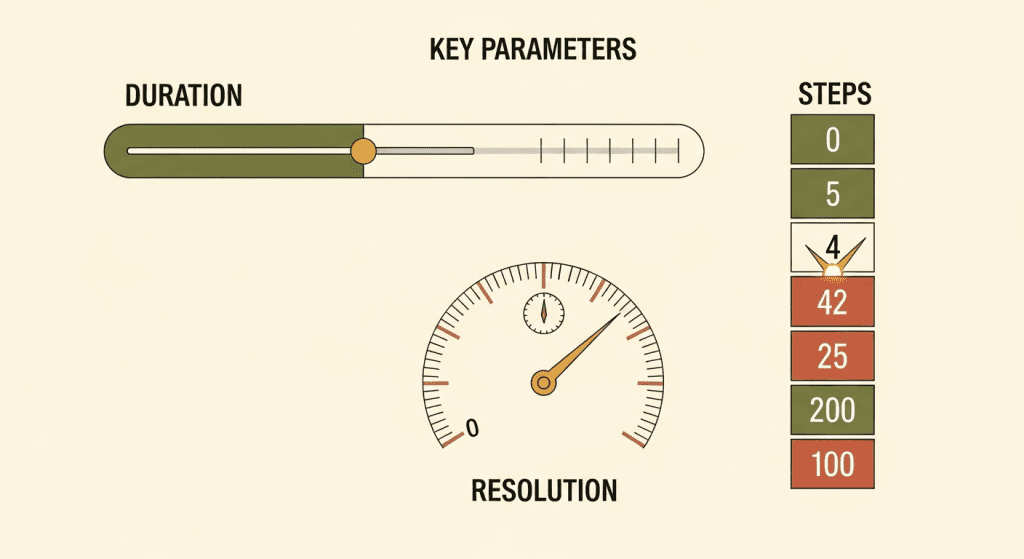
These three settings decide whether your first run feels great or glitchy.
- Duration: Start at 4–6 seconds. I use 96–144 frames at 24 fps. Longer is tempting, but errors compound over time (drift, warping). Nail a short clip first.
- Resolution: 768×432 or 832×468 for 4090: 640×360 on 12 GB VRAM. You can upscale later with a video upscaler. Going 1080p on your very first run is how you meet OOM.
- Steps: 30–40 for a draft, 50–60 when you like the composition. Past ~70 I saw diminishing returns and more chance of flicker.
My test notes (Jan 11, 10:22 a.m.): 24 fps, 128 frames, 768×432, 48 steps on 4090 took ~2 min 41 sec and produced the dust‑mote table shot I mentioned. Bumping to 60 steps made lighting nicer but also added a tiny shimmer on edges.
Use 5 “safe” starter prompts (copy/paste)
If you just want a first clean win, these gave me stable motion with minimal wobble. Paste them as is, then swap nouns and styles.
- “A slow, cinematic dolly shot across a sunlit wooden table, dust particles floating, shallow depth of field, natural morning light, 24mm lens feel.”
- “A neon sign flickering on in a rainy alley at night, puddles reflecting the colors, subtle camera push‑in, moody, high dynamic range.”
- “Close‑up of a steaming cup of coffee on a desk, gentle steam motion, soft window light, macro feel, calm atmosphere.”
- “A minimalist clay stop‑motion style of a small plant sprouting, smooth loopable growth, soft studio lighting.”
- (I2V) “Animate this still photo with a subtle parallax and natural breathing motion: keep the original colors and composition: avoid warping faces.”
Why these work: they limit chaotic elements (no crowds, no fast cuts), specify camera motion, and aim for lighting that the model handles well. When I tried “crowded street with rapid handheld camera,” the motion was jitter city.
Export settings (fps, format)
Keep exports boring and compatible on day one.
- FPS: 24 fps looks cinematic and is lighter to compute. If you need smoother, go 30. Interpolation plugins can add frames later.
- Format: MP4 (H.264) for quick sharing. If you plan color work, export ProRes 422 or a PNG sequence for lossless frames. Sequences are great for fixing a few bad frames in Photoshop.
- Bitrate: For 768×432 at 24 fps, 10–16 Mbps is plenty for previews. Go higher if gradients band.
- Color: Stick to sRGB/gamma 2.2 unless your pipeline is color‑managed. I mistakenly toggled a wide‑gamut profile and got washed highlights on upload.
On Jan 11, my 6‑second MP4 at 24 fps (H.264, 12 Mbps) landed at 9.8 MB. Looked crisp on mobile and desktop.
First-run issues (slow, OOM, weird motion)
Here’s what bit me, and how I fixed it.
- It’s slow: If your GPU sits below 60% utilization, you’re bottlenecked on CPU or disk. Close background apps, keep assets on an SSD, and drop resolution one notch. On my 4070 Ti box, going from 832×468 to 640×360 shaved ~35% off render time.
- OOM (out of memory): Cut resolution first, then steps, then duration. Also make sure “save VRAM” or tiled decoding is enabled if your workflow supports it. In ComfyUI, I enabled VRAM‑saving for VAE decode and it stopped crashing at 48 steps.
- Weird motion/wobble: Add a touch of motion consistency. In T2V, constrain camera motion in the prompt (“gentle dolly,” “tripod shot”). In I2V, pick a base image with strong edges and avoid thin patterns. I had a logo with hairline text that pulsed: thickening the font solved it.
- Flicker in lighting: Lower steps slightly or try a different scheduler (the official one is a good default). Temporal denoise in post helps: even a light pass in DaVinci Resolve cleaned my neon sign clip.
- Faces melting: Keep faces larger and well‑lit. If you need portraits, I2V with a high‑quality still worked better than T2V for me.
If nothing helps, pull the exact versions from the official docs and match their sample command line. Version drift is sneaky.
Resources I found useful: official LTX‑2 docs and workflow JSONs (checked Jan 11, 2026), and their release notes for recommended schedulers.
Last thought: LTX‑2 rewards restraint. Short clip, modest res, clear camera direction, then iterate. When it clicks, you’ll feel that little spark. I did at 1:13 a.m., and yeah, I gotta say, it was worth the lost sleep.
We built Crepal so I could quickly spin up visual drafts before committing to a full LTX‑2 render—seeing rough results early usually tells me which path is worth the time. Check it out here.
Alright, your turn—don’t leave me hanging. What was your very first LTX‑2 clip about? Drop your victory screenshot in the comments.
Previous posts: