Hello, Dora here. I snapped a quick product shot on my desk, cute ceramic mug, messy cables, and a plant leaf photobombing from the left. I just wanted a clean cutout for a landing page. Fifteen minutes later, I was knee‑deep in tabs trying to remove the background from the photo without turning the handle into a blur. That tiny job kicked off a week of testing tools, because if this is going to be part of my workflow, it has to be fast and reliable, not a new time sink. Here’s what actually worked for me, what didn’t, and how I’d use the cutout after.
Why Background Removal Is Tricky (And What Actually Works)
Background removal sounds simple: select the subject, delete the rest. In reality, pixels are messy. Edges are soft, hair is wispy, glass is see‑through, and shadows carry lots of context you don’t want to lose.
From my tests, three things made the biggest difference:
- Edge detection and refinement: Tools that do smart matting (think “feathered” transitions where needed but crisp edges on hard lines) simply look more natural. If you’ve ever seen a halo around hair, that’s poor edge handling.
- Understanding of semitransparency: Glass, smoke, or fabric veils need alpha values, not a hard on/off cut. If a tool can’t handle partial transparency, it either erases too much or leaves a weird fringe.
- Lighting and background contrast: High-contrast subjects (dark object on a light wall) are easy. If you’re generating product shots from scratch before removing the background, clean prompt structure helps more than people think — especially for typography or mockups.Same‑color scenes or busy textures (grass, confetti, patterned rugs) confuse even good models.
What actually works today: modern AI background removers for 80% of cases, and a pixel editor (Photoshop or Affinity) for the stubborn 20%. I wish it were one‑click every time. It’s not. But you can get very close with the right combo.
3 Methods to Remove Photo Backgrounds
Method 1 – AI Online Tool (Fastest)

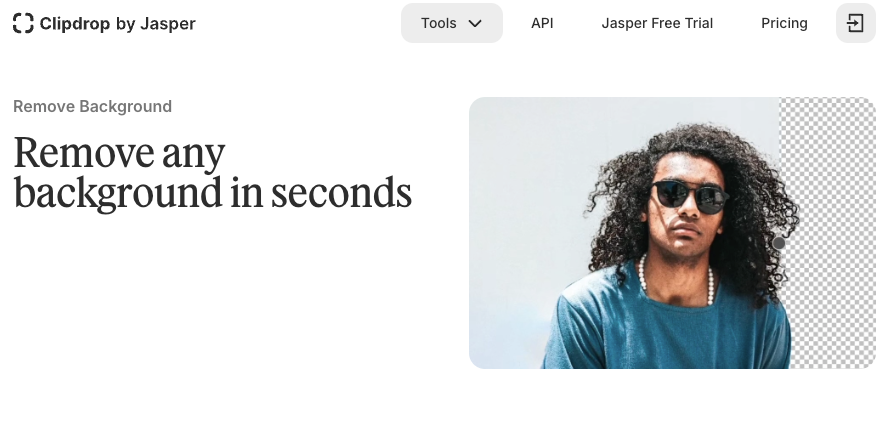
I batch‑tested 24 images, people, products, and a cat tail mid‑flick, across three AI removers: remove.bg, Clipdrop, and Adobe Express. Average time per image: 2–5 seconds on Wi‑Fi. Accuracy was surprisingly good on clear subjects (standing person, solid background). Hair and glass were the tie‑breakers.
- Speed: Nothing beats this for quick posts, thumbnails, or mockups.
- Quality: Best on portraits, products with clean edges, and shots with good contrast.
- Editing: You usually get a simple brush to restore/erase missed areas. It’s enough for tiny fixes, not full composites.
My notes:
- remove.bg got the most consistent hair edges in my test set. Clipdrop did better on small product details like cables and zipper pulls. Adobe Express was the friendliest UI if you’re already in that ecosystem.
- If the subject color matched the background (navy shirt on navy backdrop), all three struggled a bit, expect manual cleanup.
If you want to try them, start with one image on each and compare. Also, check their docs for tips and limits: remove.bg, Clipdrop Background Remover, and Adobe’s background features inside Express/Photoshop.
Method 2 – Photoshop / Affinity
When the AI guess is close but not perfect, or when you’re dealing with flyaway hair, glass, or tangled backgrounds, manual refinement wins.
In Photoshop:
- Start with Select > Subject, then jump into Select and Mask. The Refine Edge Brush is your best friend around hair and soft fabric.
- For glass, use a mask instead of a hard erase. Keep semitransparent pixels so it feels real against the new background.
In Affinity Photo:
- The Selection Brush + Refine works well, especially on product shots. The brush preview is snappy and the edge cleanup feels precise. Tutorial reference: Affinity Photo selection brush.

Time check: a tricky portrait took me 7 minutes in Photoshop vs 10–12 in Affinity because I know PS better. For simple e‑commerce product shots, Affinity was just as fast.
Use this route when:
- You need pixel‑perfect edges for print or high‑res banners.
- The background is chaotic or too similar to the subject.
- You want to keep shadows and transparency and shape them by hand.
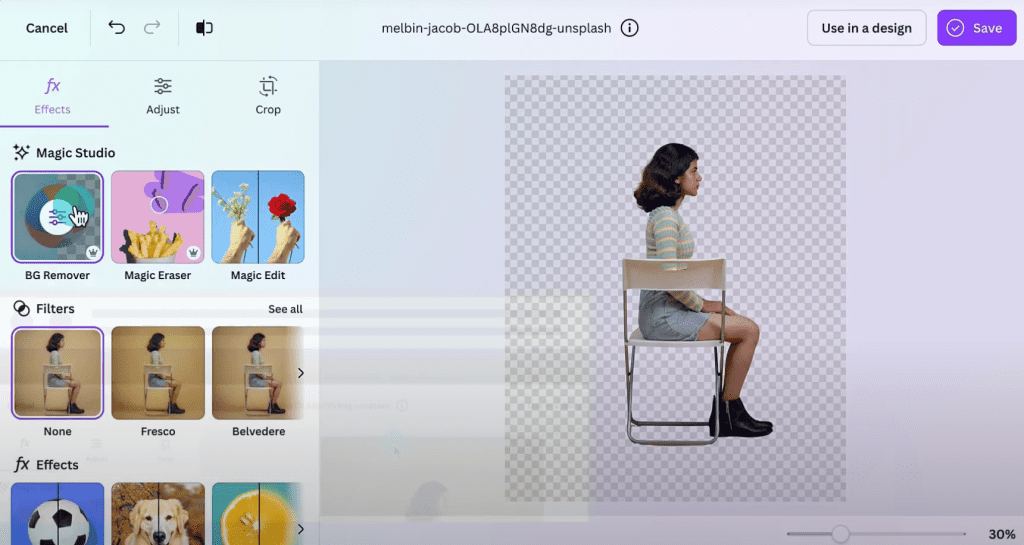
Method 3 – Canva (Good Enough for Simple Shots)
I like Canva for quick social posts. Its Background Remover is one click inside the editor. It’s fast, and on Feb 17 I cleared 10 product photos in under 4 minutes total. For simple shots, logo on white, product on wood, it’s totally fine. It falls down on flyaway hair and glass, where the edges look a bit plasticky. If you’re already designing in Canva, it saves a trip: Canva Background Remover.
Bottom line for Canva: great for speed and social graphics, not my pick for nuanced edges. If the result looks slightly fake, try lowering background contrast or adding a soft shadow under the subject to ground it.
Handling Hard Cases
Curly / Flyaway Hair
Hair is the final boss. Here’s what helped me on a Feb 18 portrait session (dark curls against a gray wall):
- Start with an AI cut to get 90% there.
- In Photoshop, Refine Edge Brush around the hairline with small strokes. Toggle the different view modes (On Black/On White/On Layers) to spot halos.
- Decontaminate Colors only if you see strong color spill from the background. It can over‑saturate if you push it.
- Add a 1–2 px feather to soften crunchiness, then a tiny contrast bump back.
If you’re in Affinity, use Refine with Matte edges and preview on a mid‑gray: it exposes halos quickly.
Transparent Objects (Glass, Water)
Avoid hard erasers. Keep a mask and paint it. You want partial transparency so the object feels real on the new background.
- Duplicate the layer, set the top one to Screen/Lighten and mask it to match natural highlights.
- Keep a soft shadow under glass to anchor it: a perfect cut with no shadow looks floaty.
- If your output is for web, export to a format with alpha (PNG or WebP) so those subtle edges survive.
Busy / Same-Color Backgrounds
When the shirt matches the wall, AI gets confused.
- Try channel‑based selections: in Photoshop, check the Red/Green/Blue channels for one with better contrast, then use it as a mask base.
- Manually paint a quick trimap (foreground/unknown/background) if your tool supports it, this gives the model stronger hints.
- If you must shoot again, add separation: side light, rim light, or literally hang a different backdrop. Future‑you will thank you.
Export Settings After Removal (PNG vs WebP)
Once your subject is clean, the export matters more than people think.
- PNG: Best for crisp graphics and anything that needs lossless quality and transparency (logos, UI, sharp product edges). Bigger files, but reliable. Quick refresher: PNG supports full alpha: see MDN’s overview of image types, PNG.
- WebP: Smaller files, supports transparency, and looks great for the web. Many CMSes now prefer it. Official reference: WebP by Google. I usually export WebP for web pages and keep a PNG master for editing.
Practical tips:
- For WebP, start at 80–90% quality: drop if you need smaller size. Check hair edges for compression fuzz.
- For print, keep a high‑res PNG or TIFF with the original color profile.
- Keep shadows on a separate layer so you can tweak opacity against any background.
What to Do With Your Cutout Next
Use as video overlay, person, product, or logo on any background
On Feb 19, I dragged a portrait PNG into a talking‑head video to punch up a product explainer. It took 30 seconds to keyframe a gentle slide‑in and it looked like I’d spent an afternoon in After Effects. Overlays are perfect for:
- Swapping backgrounds for consistent branding.
- Dropping product shots over lifestyle footage.
- Adding a logo bug without a white box awkwardly sitting there.
If you’re editing in Premiere, Final Cut, or CapCut, PNG/WebP with alpha just works. Keep a soft shadow or gradient behind the subject to avoid the “sticker on glass” vibe.
Animate your cutout in CrePal (talking head, product reveal, intro card)
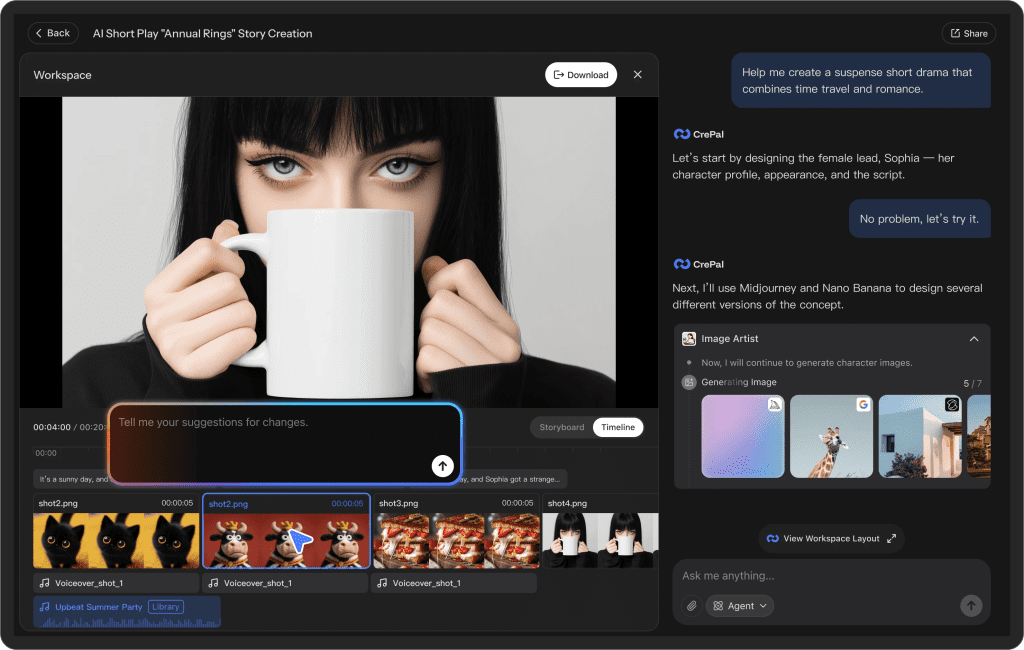
I tested CrePal on Feb 20 to turn a static cutout into a quick motion intro. The talking‑head template mapped lip‑sync decently (not perfect on plosives, but solid for short hooks). The product reveal preset was the sleeper hit, clean easing, subtle drop shadow, export in under a minute. If you want the no‑friction route from image to motion, it’s worth a spin.
Tips from that run:
- Use a slightly larger canvas than your final export, so you can re‑frame without re‑cutting.
- Keep motion under 1.2s for intros: snappy feels premium.
- If the edges look too sharp against gradients, add a 1–2 px inner shadow on the layer instead of blurring the subject.
If you prefer to stay in Adobe land, you can also animate with Essential Graphics in Premiere or the puppet‑pin/mesh tools in After Effects. But CrePal was faster for me.
If you’re doing this kind of cut-and-animate workflow often, the friction usually isn’t the cutout — it’s moving assets between tools, resizing canvases, re-exporting, and keeping versions straight.
We built Crepal to make that jump from image to motion simpler. You can bring in a clean PNG, add lightweight animation, adjust timing, and export without bouncing across five tabs.
That’s my field note dump. If you just need speed, the AI tools will get you there. If you care about edges, keep Photoshop or Affinity handy. And when you finally nail that clean cutout, don’t let it sit in a folder. Make it move.
Previous posts: