Hey guys! This is Dora. Lately I have been seeing Pollo AI pop up in my feed and finally gave it a spin, partly because I was curious, partly because I’d grown tired of static images that don’t tell the whole story. Honestly, I wasn’t expecting miracles: I wanted a tool that could take an image I already had and turn it into a short, usable video without me learning a new animation app.
Over a few sessions (timestamps noted below), I put Pollo AI’s image-to-video features through three small tests. This is my field notebook, what surprised me, what irritated me, and when I’d actually slot this into a real workflow.
What Pollo AI Is (and What It Claims)
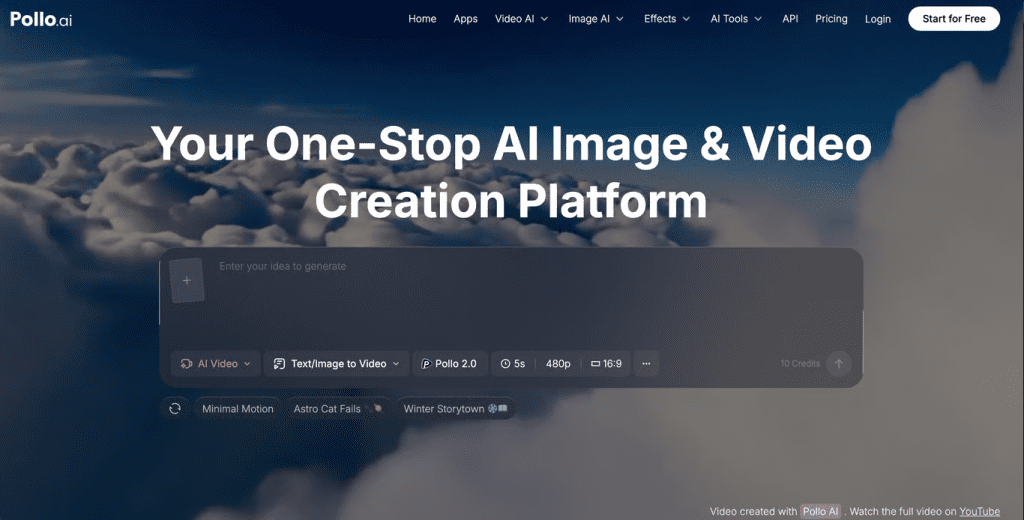
Pollo AI bills itself as a lightweight creative studio for turning still assets into motion: think image-to-video, text-to-video, and some hybrid workflows where you feed both a picture and a prompt. Their marketing leans on accessibility, no heavy-editor learning curve, and support for multiple generative models under the hood.
Platform positioning, image-to-video, text-to-video, supported models
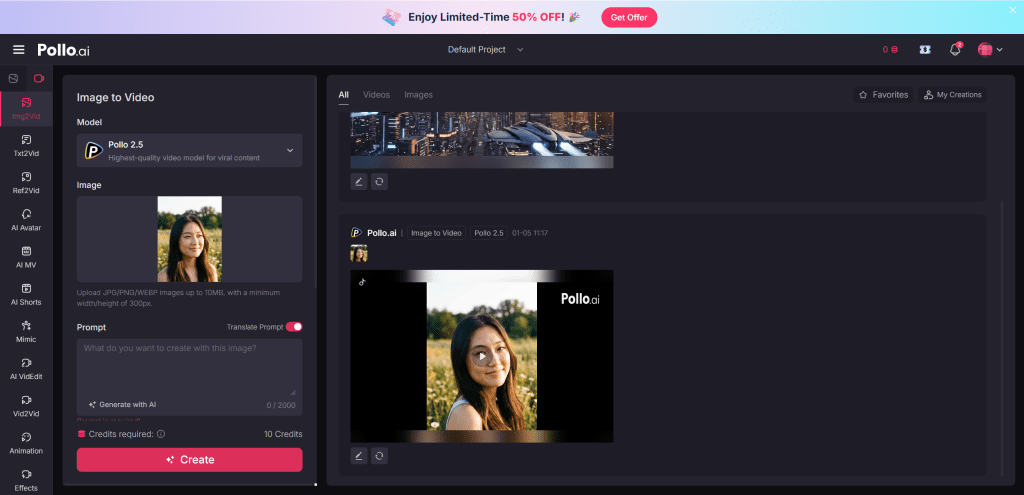
When I first poked around, the UI clearly separated image-to-video and text-to-video flows. Image-to-video is the bread-and-butter: upload a photo, choose a motion style or enter a motion prompt, pick a length, and hit generate. Text-to-video reads like a secondary mode where you type a script and Pollo stitches visuals, stock assets, and motion rules together.
Under the hood, Pollo AI doesn’t publish complete model names everywhere, but the docs (linked in the app footer) mention a mix of proprietary diffusion-variants and licensed motion models optimized for short clips. That combination explains why some outputs feel painterly while others aim for crisp, realistic motion.
Getting Access: Free Plan vs Paid
I signed up twice, once on the free tier and once I upgraded for a week to test paid limits.
Registration requirement, daily credits, watermark on free tier
Registration is required but fast: email + password or Google sign-in. The free tier gives a small handful of daily credits (enough for one brief 3–5 second image-to-video render per day, depending on settings) and includes a visible watermark on exports. For quick experiments, the free plan is fine: for client-facing work the watermark is a deal-breaker.
What the paid plan actually unlocks
Paid plans remove the watermark, raise the daily credit allowance, and unlock longer durations and higher resolution exports. I noticed a meaningful difference in export quality when switching plans, not just the watermark: paid renders allowed the engine to spend more “compute” per frame, which improved temporal consistency. For my week-long test, the uptick in usable results justified the cost when I needed clean footage for social posts.
Hands-On Testing: Image-to-Video Results
I ran three quick, practical tests that mirror real tasks creators often face: adding subtle motion to an outdoor scene, animating a portrait, and creating a product shot with a slow zoom.
Test 1, Static outdoor scene with motion prompt
Asset: a 4000×2667 JPEG of a lakeside at golden hour. Prompt: “gentle ripples across water, drifting clouds, warm color grade.” The output (5 seconds, free-tier credit) added believable cloud drift and soft ripple reflections across the water surface. The motion was subtle and pleasing, exactly what I wanted for an Instagram loop. Temporal shimmer showed up at high-contrast edges (trees against sky), but overall it felt organic.
My reaction: pleasantly surprised. For ambient social content, this is a huge time-saver.
Test 2, Portrait animation
Asset: a headshot (2000×2000 PNG). Prompt: “soft head turn, slight smile, blink.” The result produced an uncanny-but-usable brief animation: the blink and micro head turn read well, but lips and hair occasionally warped during transitional frames. For subtle intros or an animated thumbnail, it works: for close-up talking-head footage it’s still a stretch.
My reaction: impressed by the intent recognition but cautious about putting this in client-facing interviews.
Test 3, Product shot with slow zoom
Asset: a product photo on white background (1500×1500). Prompt: “slow cinematic push-in, slight vignette.” Pollo executed a smooth digital zoom and added parallax-like movement to the product shadow. At 1080p export (Pro), edges looked crisp, and the motion felt cinematic. Where it faltered was in compositions with reflective surfaces, reflections sometimes duplicated or flickered.
My reaction: excellent for quick product promos, but test reflective materials first.
What Pollo AI Does Well
- Speed for concepting: Generating a usable short clip takes minutes, not hours.
- Ease-of-use: The interface is straightforward: I rarely had to consult docs.
- Natural ambient motion: Water, clouds, foliage, subtle camera moves, these are Pollo’s sweet spot.
- Low-friction iterations: You can tweak prompts and re-render quickly and the app keeps versions, which is handy when you’re A/B testing motion for social.
Practically speaking, if your goal is to add life to stills for social posts, ads, or product thumbnails, Pollo AI delivers a lot of value without a steep learning curve.
Honest Limitations You Need to Know
No tool is perfect, and Pollo AI has clear constraints you’ll want on your checklist before committing time or budget.
Output duration cap, resolution ceiling, credit burn rate
Pollo caps output duration on most plans (my Pro week allowed up to 15–20 seconds depending on complexity). Resolution tops out at 1080p for most paid tiers: anything above that becomes expensive or unavailable. Credit burn scales with duration and complexity, a well-lit 5-second clip might cost 1–2 credits, while a complex reflective scene eats more.
If you need long-form, high-resolution deliverables, Pollo isn’t the fit yet.
Failure patterns (what image types produce bad results)
- Busy, cluttered scenes: Motion artifacts increase with visual complexity.
- High-reflectance surfaces: Mirrors, chrome, glossy plastics often produce duplicated or warped reflections.
- Low-resolution inputs: Small or compressed images create jittery frames: start with as-large-as-possible originals.
In short: simpler compositions with clear subject/background separation get the best results.
Pollo AI vs Alternatives
I compared Pollo AI to two other tools I’ve used: Kling (a strong competitor for stylized image-to-video) and a third tool I’ll call “ThirdTool” (a generalist that emphasizes text-to-video pipelines). Below is a compact comparison to show where Pollo sits.
Comparison table: Pollo vs Kling vs [third tool]
| Feature / Metric | Pollo AI | Kling | ThirdTool |
| Ease of use | High | Medium | Medium-High |
| Best for | Subtle, natural motion | Stylized loops | Scripted text-driven clips |
| Max export res | 1080p (paid) | 4K (paid tiers) | 1080p–4K (varies) |
| Cost efficiency | Good for short clips | More expensive per render | Variable, often more credits |
| Failure modes | Reflective surfaces, clutter | Stylization artifacts | Incoherent scene edits |
| Ideal user | Social creators, product promos | Artists, loop creators | Marketers needing script-driven videos |
Decision criteria: when to choose Pollo, when to switch
Choose Pollo if you want quick ambient motion with minimal fuss, think product promos, social loops, or animated thumbnails. Pick Kling if you need high-style loops and higher-res exports and you don’t mind a steeper learning curve. Use ThirdTool when you need text-driven storytelling or multi-scene editing that stitches stock clips with narration.

Who Should Use Pollo AI (and Who Shouldn’t)
Use Pollo AI if:
- You’re a content creator who wants to breathe life into existing images quickly.
- You make short-form social videos, ads, or product promos and value speed and ease over absolute fidelity.
- You need a low-friction way to prototype motion concepts.
Don’t use Pollo AI if:
- You need long, high-resolution, frame-perfect footage for broadcast.
- Your images are complex, reflective, or low-res and you can’t replace/retake them.
- You require lip-synced full talking-head videos for professional interviews.
FAQ
Q: Is Pollo AI safe to use with copyrighted photos?
A: The platform’s terms request you only upload assets you own or have rights to. Treat it like any cloud tool: don’t upload sensitive or unlicensed images.
Q: Can Pollo animate SVGs or layered PSDs?
A: Pollo mainly accepts raster inputs (JPEG, PNG). Layered PSD support is limited: you’ll get better control by exporting layers as separate images and compositing externally.
Q: How long do renders take?
A: Typical 3–6 second clips render in 30–90 seconds on paid tiers: free-tier queues can add delay.
Q: Any official docs I can read?
A: Yes, Pollo AI links to an FAQ and model notes in-app. I cross-checked a few details there during testing. Not sponsored, just honest results.
Verdict
After a week of tests, my takeaway is straightforward: Pollo AI is a pragmatic, friendly tool for creators who want to convert stills into short, engaging videos without a steep learning curve. It won’t replace an editor for high-end deliverables, but for social-first content, ads, or quick product promos, it accelerates the creative loop.
If you’re curious, try the free tier to see the motion style for your images, you’ll quickly know whether your assets play nice with Pollo’s strengths. For paid users, the time saved iterating and the improved export quality make it worth a trial run. Bottom line: I found it helpful, occasionally delightful, and annoyingly imperfect in predictable ways, which, honestly, is where most useful tools live.
If you want, I can share the original test assets and timestamped renders I used (they’re small) so you can compare results on your own feed. Not sponsored, just my field notes from real tests.
Previous Posts: