I’m Dora — and I test every image model the moment it drops, usually at an unreasonable hour with cold coffee. GPT Image 2 launched April 21, 2026, and I had it open within the hour. Not for generation — I’ve been watching the editing side, because that’s where the real workflow change is hiding.
Here’s the version of events nobody puts in a headline: I had a product shot that was 90% there. Good composition, decent lighting, background that looked like a beige fever dream. My usual move is Photoshop, 20 minutes on a selection, edges that still look wrong, restart. Instead I uploaded it, typed “replace the background with a clean white studio surface, soft diffuse shadows,” and got something usable in under two minutes. Clean edges. Realistic shadow. The bottle looked untouched.
That’s when I stopped treating this as a generation tool and started paying attention to what it actually does to existing images. This guide is what I’ve figured out since — what works, what quietly fails, and where other tools still have a real edge.
What GPT Image 2 editing can do
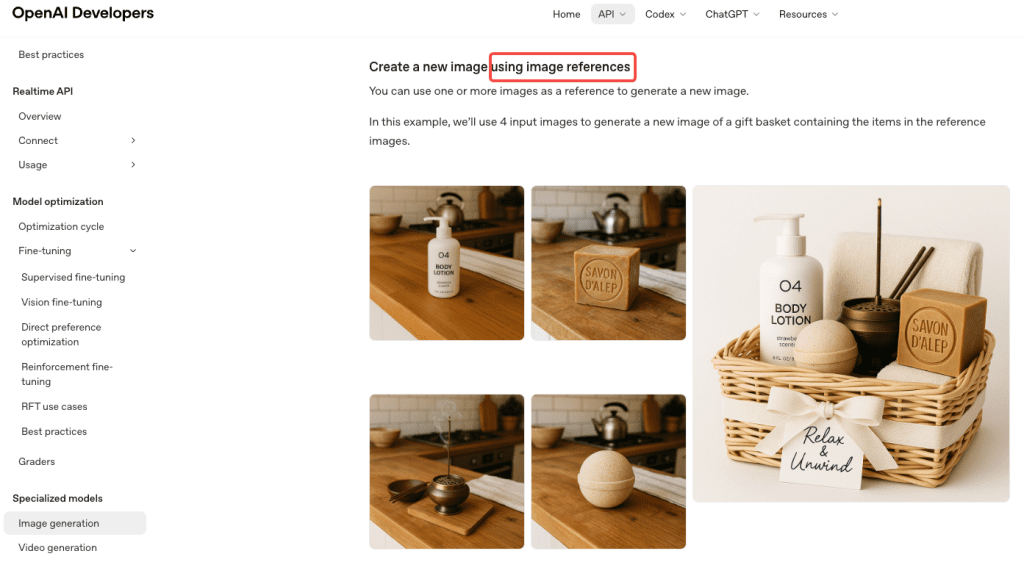
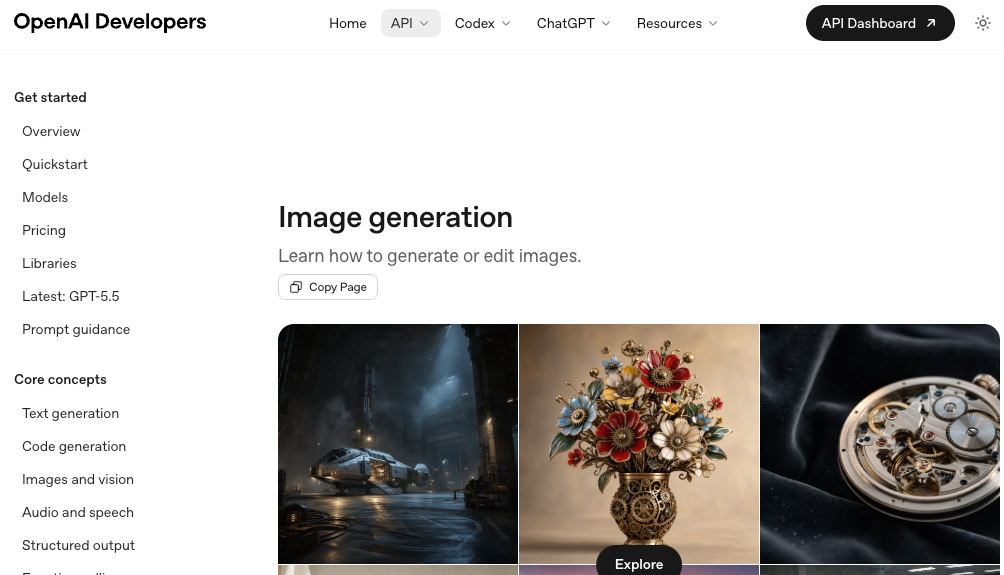
The model supports two editing modes. You can describe a change in plain chat and let it apply broadly, or you can draw a selection over a specific region and keep the edit contained. OpenAI’s image generation guide explains that the edits endpoint takes a reference image alongside a text prompt and applies targeted changes while preserving what you didn’t ask to touch.
In practice: you’re not regenerating from scratch every time you tweak something. That’s a bigger deal than it sounds, especially if you’ve spent any time fighting DALL-E 3’s tendency to rebuild the entire image when you wanted to fix one corner.
What editing handles well:
- Background swaps and full replacements
- Object removal when the surrounding area isn’t too complex
- Lighting and color temperature shifts
- Text edits inside the image — this is the real news. Text rendering accuracy now sits above 95% across Latin, Chinese, Japanese, Korean, and Arabic scripts, per independent PixVerse testing
- Adding or replacing contained elements within a selection
- Cleanup: logos, reflections, stray objects, distracting edges
Where it still gets wobbly:
- Precise spatial repositioning — “move the logo 40 pixels right” is not a concept it understands
- Face consistency across many editing rounds (more on this below, with actual numbers)
- Complex texture preservation at masked region borders
- Transparent PNG output — not supported at all in GPT Image 2
What you need before you start
Uploads, selection tool, and full-scene edits
No API key needed to get started. ChatGPT Plus, Pro, or Business gives you full GPT Image 2 access in the chat interface, including editing. Free users can generate with Instant Mode but Thinking Mode — where the deeper reasoning pass happens — is gated to paid tiers.
OpenAI’s April 2026 announcement confirmed three distinct editing starting points:
1. Upload and describe in chat. Drag in your photo, type what you want changed, the model applies it to the full image. Best for broad adjustments: background swap, overall lighting shift, color temperature change.
2. Upload and use the selection tool. Draw a rough selection over the target region, describe the edit. The model focuses inside that boundary. Best for isolated fixes — one element, one area, everything else preserved.
3. Pass a mask programmatically via API. For workflows and automation: pass a mask_image_url alongside your reference image. White regions = edit zone, everything outside stays pixel-perfect. This is the cleanest version of surgical editing, and it’s what you reach for if you’re building pipelines or batching edits at scale.
One thing that caught me off guard: the model processes image inputs at high fidelity automatically. No option to dial this down — it always works from the full-resolution input. Good for quality. Worth knowing if you’re estimating API costs.

Step-by-step editing workflow
Local edits and cleanup
Step 1: Upload JPG or PNG. PNG is cleaner for editing workflows if edge preservation matters.
Step 2: Make your selection loose, not tight. This confused me at first. Precise, tight selections around objects tend to produce worse edge blending than a slightly larger, relaxed selection. Give the model breathing room around the target — think feathered brush, not scalpel.
Step 3: Describe the target state, not the problem. “Remove the reflection” kept giving me weird results. “Replace the surface with a flat matte finish, no reflections” worked immediately. The model responds much better to what you want than to what you’re trying to eliminate.
Step 4: Check the edges before you move on. GPT Image 2 handles blending better than GPT Image 1.5 did, but bleed still happens on complex scenes — fine hair, fabric texture, thin branches. Zoom in. Don’t trust the thumbnail.
Step 5: Revise in chat, don’t restart. Type “the left edge looks off — blend it more naturally” and keep going. The multi-turn revision loop is genuinely good, and it’s what separates this from the old generate-and-pray workflow.
Background swaps and object changes
Background replacement is the most reliable use case I’ve found. Here’s what works:
Product photography: Select the background area broadly, describe the replacement in detail. “White background” gives mediocre results. “Clean white studio surface, soft diffuse lighting, subtle drop shadow beneath the product” gives something you can actually use. The specificity gap between those two prompts is everything.
Lifestyle photos: Background swaps get harder because the model has to match existing light. If your subject was lit from the left in the original, but your new background implies right-side sunlight, it’ll look wrong. Prompt the lighting direction explicitly: “outdoor park background, golden hour light from the left, slightly backlit.” Make the model match your subject’s light, not the other way around.
Object and text changes: Swapping a prop, changing clothing color, updating text on a sign — these work well when the replacement is self-contained. Replacing text on a product label? Consistent. Replacing one person’s jacket while keeping another’s unchanged in the same shot? Real risk of bleed. The selection tool helps but doesn’t fully solve it.
Revisions without breaking consistency
Here’s where I want to be specific, because vague warnings aren’t useful.
A three-week independent review found that face and outfit consistency held through 10–12 images in a generation series — but past 15, subtle facial drift started appearing. For editing workflows where you’re returning to the same source image, the pressure is somewhat different, but the principle holds: small shifts accumulate across revision rounds.
In my own editing tests: clean results through three or four passes. Around round five or six — especially when each pass touched a different area — I saw color temperature drift, slight brightness shifts in backgrounds, subtle changes in shadow direction. None dramatic on their own, but noticeable if you’re producing a coordinated set of brand assets.
What helps:
- Keep all revisions in the same chat thread. The model uses prior context.
- Be explicit about what to preserve: “keep the existing color temperature and shadow direction, only change the background element.”
- For e-commerce sets or brand campaigns where consistency across images matters — batch edits into one well-specified prompt rather than five separate rounds.
The multi-turn editing is a fast iteration tool. It’s not version control. Treat it accordingly.
Limits, risks, and failure cases
I want to be direct here, because I wasted a lot of credits discovering these the hard way.
Selection bleed is real and officially documented.OpenAI’s masking documentation explicitly states that masking with GPT Image is entirely prompt-based — the model uses the mask as guidance but may not follow its exact shape with complete precision. This is a design characteristic, not a bug in the queue for a fix. On simple backgrounds it’s usually manageable. On complex scenes with fine detail at the selection border, plan for it.
Pixel-coordinate positioning doesn’t work. You can’t reliably say things like “move 50px left” or “align to the bottom edge.” It understands intent, not coordinates. For precise layout work, Photoshop is still better.
Face drift across multiple edits. Consistency is strong for a few rounds (around 10–12 in testing), but multiple iterative edits can gradually shift facial details, lighting, or background tone—especially around the subject.
No transparent PNG output. Alpha channels aren’t supported. If you need cutouts or stickers, use a separate background removal tool or another model that supports transparency.
Content policy refusals on valid requests. Real people, copyrighted characters, or sensitive likenesses may be blocked or altered. Reframing as “fictional” or “illustration-style” sometimes helps.
Alternatives for harder edits
Worth knowing: GPT Image 2 is now available as a partner model inside Adobe Firefly. You can access the same editing engine with Photoshop integration and Firefly’s Precision Flow tools layered on top — which gives more surgical control than the ChatGPT interface alone if you’re already inside the Adobe ecosystem.
For tasks where GPT Image 2 specifically falls short:
Pixel-precise compositing and layer management: Photoshop (with Generative Fill) is still better for precise compositing and detailed layer work.
Transparent PNG output: Tools like Remove.bg or Canva are faster and cleaner for simple cutouts and PNG transparency.
Stylized art and painterly reinterpretation: Midjourney V7 still performs better for highly stylized or painterly images. GPT Image 2 is stronger at following instructions and rendering text.
Reusable brand style systems: Adobe Firefly is better if you need a repeatable, trainable visual style for a brand.
The honest summary: GPT Image 2 editing is a generalist that’s better than anything else at the “mostly right, fix one thing” task. It’s not trying to replace every tool. Know where its range ends.
FAQ
Can I edit an image I didn’t generate in ChatGPT? Yes. Upload any photo — phone shot, product photography, downloaded stock image — and edit it. The model has no requirement that images originated from GPT Image 2.
Does the selection tool work on mobile? Yes — ChatGPT’s mobile app supports image uploads and the selection/editing workflow. The drawing interface is less precise than desktop but functional for most editing tasks.
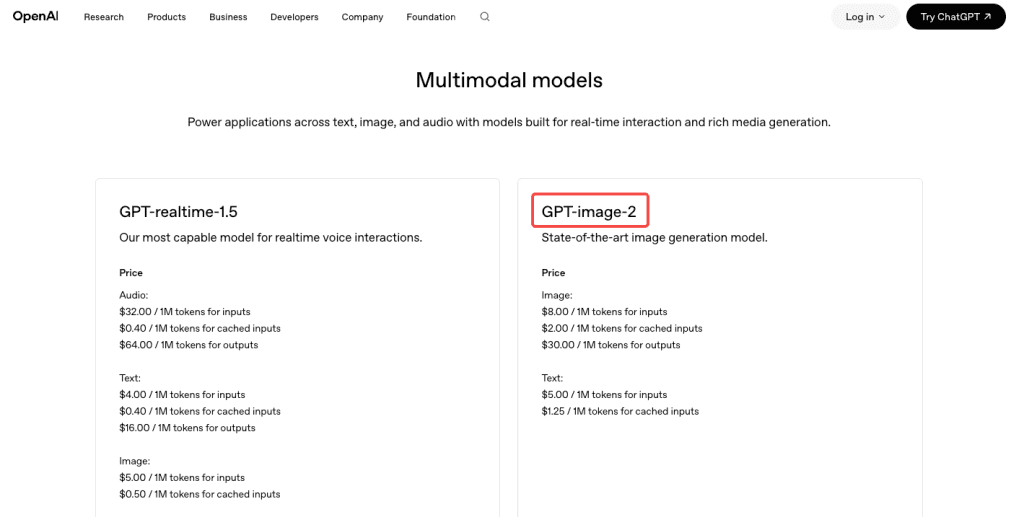
Is GPTImage 2 free to use for editing? Editing features require Plus, Pro, or Business subscription. Free tier is Instant Mode generation only. API access is token-based — OpenAI’s pricing page has current rates. Token pricing means simple edits cost less than complex ones, which is fairer than flat per-image pricing if your edits vary.
Conclusion
Three weeks in, GPT Image 2’s editing side is what’s actually changed my workflow — not the generation. The “mostly right, fix one thing” problem is the one I run into every day, and this is the first tool that makes it fast without making me feel like I’m gambling on whether the output will match the input.
The limits matter: no transparent PNG, selection bleed on complex edges, face drift past a certain number of passes, no pixel-coordinate control. Know those going in and you won’t waste credits hitting walls I already hit.
If you’ve only been using GPT Image 2 for generation and haven’t touched the editing workflow — that’s the part worth your time next.
Previous Posts: