Editor’s Notes & Practical Guidance:
When you buy a pocket gimbal camera like the DJI Osmo Pocket 3, marketing videos make it look effortless: rotate the screen, walk around, and publish a viral short. But during our studio’s first week of client field shoots, reality hit hard. We dealt with blown-out skin highlights in changing sunlight, micro-jitters when walking downhill, and Premiere Pro grinding to a halt when decoding 10-bit D-Log M HEVC footage without hardware acceleration.
Testing Hardware & Configuration: DJI Osmo Pocket 3 (Firmware v01.04.08), paired with DJI Mic 2 transmitter via internal receiver, shooting on SanDisk Extreme Pro V30 microSD. Post-production tested on an Apple M3 Max (Metal hardware decoding) and a Windows PC (RTX0409, NVDEC acceleration).
Transparency & Disclosures: We purchased this equipment through standard commercial retail channels. This tutorial contains no paid sponsorships or affiliate tracking parameters.
The DJI Osmo Pocket series has become the go-to setup for solo creators, vlogging teams, and agile marketing agencies. A 3-axis mechanical gimbal paired with a 1-inch CMOS sensor gives you smooth, cinematic footage that smartphone digital stabilization simply cannot match without warping the edges.
However, shooting smooth footage is only a fraction of the battle. If your camera settings are misconfigured, your files unorganized, or your computer unequipped for 10-bit video decoding, editing a 45-second short can take three hours instead of twenty minutes.
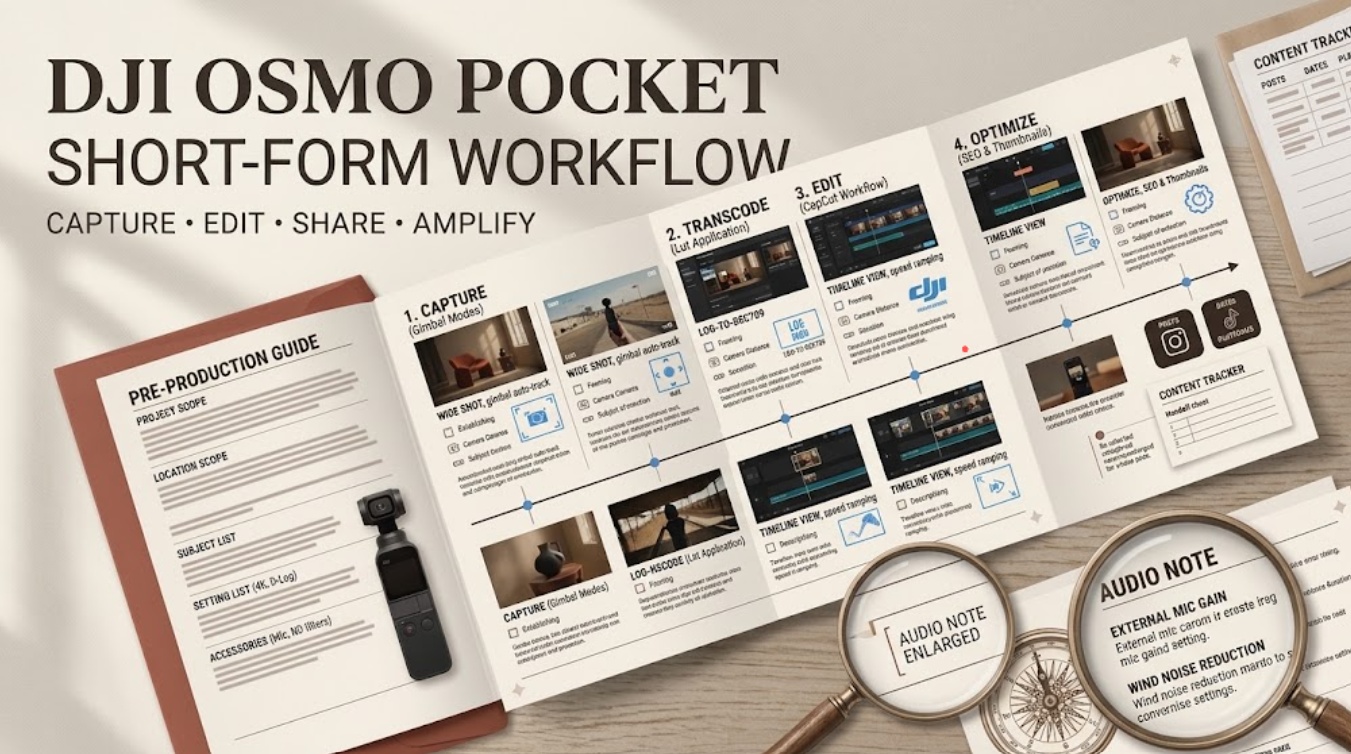
This tutorial shares our studio’s step-by-step DJI Osmo Pocket workflow, breaking down real camera setups, file management routines, timeline pacing tricks, and clean export standards.
Plan One Short Before Recording
The biggest mistake creators make with a pocket camera is treating it like an endless tape recorder. When you film twenty minutes of unscripted b-roll for a 30-second short, you pay for it later with massive editing fatigue.
┌────────────────────────────────────────────────────────────────────────┐
│                     The 45-Second Narrative Structure                  │
├─────────────────┬──────────┬───────────────────────────────────────────┤
│ BEAT            │ DURATION │ CAMERA FRAMING & PURPOSE                  │
├─────────────────┼──────────┼───────────────────────────────────────────┤
│ 1. The Hook     │ 0–3s     │ Dynamic forward push / macro action cut   │
│ 2. The Setup    │ 4–12s    │ Medium eye-level framing; vocal thesis    │
│ 3. The Evidence │ 13–35s   │ Three fast 4-second B-roll insert details │
│ 4. The Payoff   │ 36–45s   │ Walking pull-back; concise call to action │
└─────────────────┴──────────┴───────────────────────────────────────────┘
Define the Hook and Shot List
Before turning the camera on, write down your opening spoken sentence and the exact visual action that accompanies it. If your opening line is “This pocket camera ruined my main rig,” start the video with a physical close-up of you sliding the camera out of your pocket, not a lingering three-second shot of your face clearing your throat.
Choose Horizontal or Vertical Delivery
Set your orientation before recording.
- Vertical (9:16): With the Pocket 3, rotate the physical OLED screen vertically. This uses the full sensor height (3840×2160 or 3K vertical depending on frame rate), preserving crisp resolution.
- Horizontal (16:9): If your primary deliverable is desktop YouTube or a corporate site, shoot horizontally.
Field Lesson: Never shoot horizontal with the vague intention of “cropping it vertical later.” Cropping 16:9 4K down to a 9:16 vertical slice discards over 60% of your sensor’s horizontal pixels, resulting in noisy, low-resolution clips that look noticeably soft on mobile screens.
Capture Stable, Editable Footage
A gimbal keeps the horizon level, but it cannot prevent exposure flickering or poor audio. Configure these core camera settings before pressing record:
| Setting Parameter | Tested Production Value | Why It Matters for Editing |
| Color Profile | D-Log M (10-bit) or Normal (8-bit) | Use Normal for instant turnarounds; use D-Log M if color grading. |
| Shutter Speed | Fixed at 1/100s (for 50fps) or 1/50s (24fps) | Preserves natural motion blur; prevents jerky digital motion. |
| White Balance | Manual (e.g., 5500K Daylight) | Prevents camera from shifting color temperature mid-take. |
| Exposure Warning | Zebra Stripes set to 95% | Immediately flags clipped skin tones and blown skies. |
Record Clean Takes and Room Tone
If you use the Osmo Pocket 3 Creator Combo, pair the DJI Mic 2 directly to the camera’s internal receiver.
- Clip the microphone at sternum height, roughly six inches below your chin.
- Enable 32-bit Float Internal Recording directly on the transmitter as a safety backup. If an unexpected shout or car horn clips the camera’s audio input, you can pull the unclipped 32-bit float
.WAVfile from the microphone’s onboard storage. - Record 10 seconds of ambient silence (room tone) before speaking. Your editor’s AI voice isolation tools need this quiet profile to strip room reverb without making your voice sound robotic.
Protect Highlights and Subject Continuity
Because the Pocket’s lens aperture is fixed at f/2.0, shooting outdoors on a sunny day with a locked shutter speed will massively overexpose your image. Use an official magnetic ND filter (ND16 or ND64) to control light intake rather than ramping the shutter speed to 1/4000s, which produces unnatural, strobe-like motion.
Organize and Transfer the Source Clips
Do not edit directly off the microSD card. High-bitrate 10-bit HEVC video files generate intense read-write cycles that cause micro-stutters and dropped frames if read over a slow card reader.
┌────────────────────────────────────────────────────────────────────────┐
│                   Production Folder File Architecture                  │
├────────────────────────────────────────────────────────────────────────┤
│ 📁 2026-09-22_Pocket_Commercial_Shoot/                                 │
│    ├── 📁 01_Source_A-Roll/     (Main talking-head takes)              │
│    ├── 📁 02_Source_B-Roll/     (Cutaways, product inserts, macro)     │
│    ├── 📁 03_Audio_Stems/       (Master 48kHz WAV & 32-bit float backup)│
│    └── 📁 04_Exports/           (Rendered rough and master MP4s)       │
└────────────────────────────────────────────────────────────────────────┘- Transfer via High-Speed Card Reader: Connect a USB-C 3.2 reader directly to an SSD. Do not transfer gigabytes of video over wireless phone apps if you plan to edit on a computer.
- Rename Key Takes: Replace camera file names like
DJI_20260922110412_0001_D.MP4with descriptive tags:Take01_A-Roll_Hook.mp4. This prevents searching through generic thumbnails on the timeline.
Turn Footage Into a Short-Form Draft
Now you can bring your footage into your video editor (such as Premiere Pro, DaVinci Resolve, or CapCut Desktop).
┌────────────────────────────────────────────────────────────────────────┐
│                      Timeline Assembly Topology                        │
├────────────────────────────────────────────────────────────────────────┤
│ TRACK V3 [TEXT]   ├── Dynamic Subtitles / Animated Captions ─────────┤ │
│ TRACK V2 [B-ROLL] ├── B01 (Macro) ──┤├── B02 (Tracking) ─────────────┤ │
│ TRACK V1 [A-ROLL] ├── Talking Head ─┤├── Talking Head (Trimmed) ─────┤ │
│ TRACK A1 [VOICE]  └───────────── Master 48kHz Mic 2 Stem ────────────┘ │
│ TRACK A2 [MUSIC]  └───────────── Background Bed (-22 dBFS Ducked) ───┘ │
└────────────────────────────────────────────────────────────────────────┘
Select, Trim, and Sequence
- Lay the Audio First: Drop your dialogue track onto Track A1. Trim out false starts, breaths, and long pauses. The spoken words should flow at a steady, natural cadence without dead air.
- Rough Cut on Track V1: Place your primary A-roll footage on Track V1 and cut it to match the edited audio.
- Color Management (If Shooting D-Log M): Apply the official DJI D-Log M to Rec.709 LUT to restore natural contrast and color saturation. Ensure your software’s timeline color space is set to Rec.709.
Add AI-Assisted Captions, B-Roll, or Variations
Once your core A-roll is locked, enhance the edit:
- Generate Auto-Subtitles: Run auto-transcription to create timed captions. Style them with a bold, high-contrast font, placed in the vertical middle-third to avoid interface clutter from TikTok or Instagram Reels.
- Cover Edit Cuts with B-Roll: When you trim out a pause in your talking-head track, the cut can cause a jarring head-jump. Drop a relevant 2-second B-roll clip on Track V2 over the seam to hide the cut cleanly.
When building multi-scene marketing campaigns that combine live handheld footage with generated supplementary cutaways, teams often plan and pace their scripts inside workflow hubs like CrePal. Within CrePal, creators organize their scene-by-scene beats, structure voiceover cadences, and review supplementary visual prompts before locking the final edit.
Review Authenticity, Rights, and Export
Before rendering the final video, complete an editorial checklist:
| Review Gate | Quality Failure | Studio Remediation |
| Audio Clarity | Background music drowning out speech | Duck music to -20 dBFS to -24 dBFS under dialogue. |
| UI Safe Zones | Text cut off by platform share buttons | Keep all titles inside the center 80% boundary. |
| Commercial Rights | Unlicensed background music detected | Replace with commercially licensed tracks or original audio. |
Technical Export Settings
Use these standard settings to avoid compression artifacts when uploading to social platforms:
- Container & Codec: MP4, H.264 (AAC audio at 320 kbps, 48 kHz).
- Resolution: 1080 x 1920 (Vertical 9:16) or 2160 x 3840 (4K).
- Frame Rate: Match project timeline (typically 30.00 or 60.00 fps Constant Frame Rate).
- Bitrate: Variable Bitrate (VBR, 2-pass) with a Target Bitrate of 20 to 25 Mbps for 1080p, or 45 to 55 Mbps for 4K.
FAQ
Can Osmo Pocket clips keep orientation metadata across editors?
Yes. The Osmo Pocket 3 writes physical orientation flags into the MP4 file header. Modern editors (Premiere Pro, DaVinci Resolve, Final Cut Pro) read this flag and rotate the clip automatically. If a clip appears sideways, manually set rotation to 90° in your editor’s transform panel.
Which DJI color profiles need conversion before social delivery?
Footage shot in the Normal profile requires no conversion and can be exported directly. Footage shot in D-Log M or HLG requires an official Rec.709 conversion LUT or manual color correction before export, otherwise your video will look washed out and grey.
Does DJI Mimo retain original clips after mobile exports?
Yes. When using the mobile DJI Mimo app, your original high-bitrate video files remain untouched on the camera’s microSD card. The app writes newly compressed versions to your smartphone’s photo gallery.
Can Pocket footage use external audio without manual resyncing?
Yes. When pairing a DJI Mic 2 transmitter directly to the Osmo Pocket 3 via Bluetooth or the built-in receiver, the camera bakes the audio track directly into the video file in real time, eliminating the need for manual slate claps or audio waveform syncing in post.
Can Pocket cameras save custom shooting presets for recurring shorts?
Yes. The camera settings menu lets you save custom shooting profiles. You can create a preset for “Indoor Talking Head” (4K/24fps, D-Log M, manual 5000K white balance) and another for “Outdoor Action” (4K/60fps, Normal profile), allowing you to switch modes in seconds.
Conclusion
The DJI Osmo Pocket workflow bridges the gap between smooth handheld shooting and fast post-production delivery. By establishing a 45-second shot list before filming, locking exposure settings to protect highlights, recording clean dialogue with dedicated microphones, and organizing your timeline systematically, you can produce professional social shorts without editing burnout.