I fell into a 2 AM rabbit hole last month. I was trying to turn a hand-drawn fantasy sketch into video, and every cloud tool I used kept silently rejecting it — no error, just a blank output. Eventually, I realized the problem wasn’t my prompt. It was the filters.
That sent me down two weeks of digging into how these tools actually work — and why some block inputs while others don’t. If you’ve hit the same wall, this guide is for you.
Here’s what you’ll get: a clear breakdown of how image-to-video AI works, how to choose the right tool, and what you need to know before generating — based on real testing and 2026 benchmarks.
How Uncensored AI Image to Video Generator Tools Actually Work
Model architecture overview (simple explanation)
At the core of most image-to-video tools right now is a diffusion model — the same family of models behind image generators like Stable Diffusion. The short version: the model learns to “denoise” random noise into structured visual content, frame by frame, guided by your input image and any text prompt you give it.
What makes image-to-video different from text-to-video is the conditioning step. Your input image isn’t just decoration — it becomes a spatial anchor. The model uses it to define the initial frame and then generates subsequent frames that maintain coherence with that starting point. Think of it less like “drawing from scratch” and more like “animating something that already exists.”
Most modern i2v models — including open-source ones you can run locally — are built on architectures like latent diffusion models, which compress images into a lower-dimensional space before processing. That’s why they’re faster than you’d expect given how complex the outputs look.
Why some tools filter and others don’t
Here’s the thing nobody explains clearly: filtering happens at multiple layers, and they’re not all the same.
Cloud-based tools (the ones you use in your browser) almost always apply filters at the API level — meaning before your image even reaches the model. These filters are set by the company, shaped by their terms of service, investor relationships, and platform risk tolerance. They’re often blunt. An artistic nude that would sail through a gallery submission gets rejected because a keyword in your prompt tripped a classifier.
Local open-source tools don’t have that layer — because there’s no company sitting between you and the model weights. When you run something like Stable Video Diffusion locally, the only limits are your hardware and the base model’s training. That said, the base model itself was trained on data with its own filtering decisions baked in — so “uncensored” is always a spectrum, not an absolute.
API-based access sits in between. You’re querying a model through code, but the provider still controls what outputs it returns. Some providers offer less restrictive models for verified developer accounts.
Types of Uncensored Image-to-Video Generators
Cloud-based (convenient, limited freedom)
Cloud tools win on accessibility — no setup, no GPU required, works from any browser. The tradeoff is that you’re operating inside someone else’s content policy.
For most creative work — stylized art, fantasy scenes, abstract animation — cloud tools are perfectly fine. Where they consistently struggle is with anything adjacent to mature themes, real people’s faces (especially celebrities), or inputs that look even loosely like news imagery.
If your workflow is mostly stylized illustration → video, cloud tools will cover the majority of your needs. If you’re hitting constant rejection on legitimate creative inputs, that’s your signal to look at local options.
Local open-source (maximum freedom, setup required)
This is where things get genuinely interesting — and genuinely complicated.
Running a model locally means you control the full stack. No content filter between you and the output. The catch: you need a capable GPU (realistically 12GB+ VRAM for quality i2v outputs in 2026), patience with the setup process, and comfort with command-line tools.
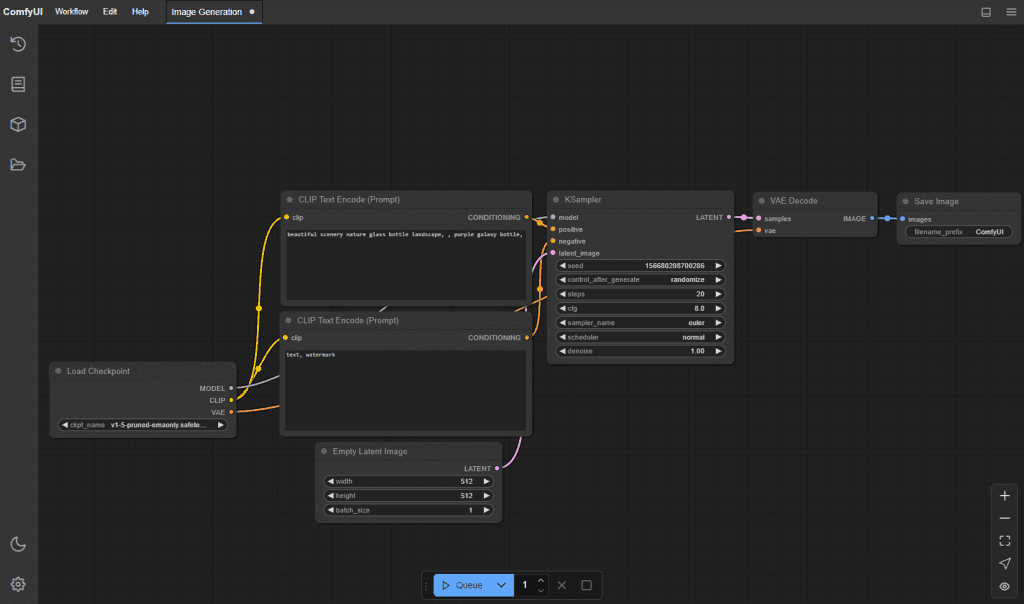
The ComfyUI ecosystem has become the go-to interface for local workflows. It’s not beginner-friendly, but the community documentation is excellent and there are pre-built workflows that cut setup time significantly.

API-based (for developers)
If you’re building something — an app, an automation, a pipeline — API access is the right path. You get programmatic control, you can batch process inputs, and some providers offer model tiers with fewer restrictions for verified commercial accounts.
The tradeoff here is costly. API usage on high-quality i2v models adds up fast if you’re generating at volume. Always prototype with a small batch before committing.
Top Picks for Each Type
Cloud-based:
- Kling AI — strong motion quality, handles stylized art well, relatively permissive for non-realistic inputs
- Runway Gen-4 — consistent output quality, good for professional creative work, stricter filtering
- Pika 2.0 — fast iteration, good for short clips and social content
Local open-source:
- Stable Video Diffusion (SVD) — the workhorse, solid community support, runs on consumer GPUs
- CogVideoX — strong for longer coherent sequences, higher VRAM requirement
- AnimateDiff — better for stylized/animated aesthetics than photorealistic
API-based:
- Replicate — hosts many open-source i2v models with API access, pay-per-generation
- fal.ai — fast inference, good for high-volume workflows
- Stability AI API — direct access to SVD variants
Comparison Table
| Type | Setup effort | Cost | Freedom | Best for |
| Cloud | None | Credits/subscription | Limited | Quick iteration, stylized art |
| Local | High | One-time GPU cost | Maximum | Full creative control, sensitive inputs |
| API | Medium | Per-generation | Moderate | Developers, automation, pipelines |
Setup Guide: Local i2v Generator (High-Level)
I’m not going to walk you through every terminal command here — that would double the length of this article and half of it would be outdated in three months anyway. But here’s the honest overview of what you’re signing up for:
- Hardware check first. Don’t skip this. SVD at 576×1024 needs at minimum 12GB VRAM. CogVideoX at full quality wants 24GB. If you’re on a 8GB card, you can run lower-resolution workflows but expect compromises.
- Install ComfyUI. Follow the official ComfyUI setup guide — it’s the most maintained and the community workflow library is unmatched.
- Download model weights separately. Models aren’t bundled with the interface. You’ll pull them from Hugging Face or CivitAI. File sizes range from 8GB to 30GB+ depending on the model.
- Install the i2v-specific nodes. ComfyUI has a node-based workflow system. You’ll need to add the video-specific node packages (ComfyUI-VideoHelperSuite is a common one) to get image-to-video pipelines working.
- Start with a community workflow. Don’t build from scratch on your first run. Load a pre-made workflow JSON, get one successful output, then start modifying.
Expect the first successful output to take you 2-4 hours if you’ve never done local model setup before. That’s normal. The second time takes 20 minutes.
Terms of Service and Legal Considerations
This is the part most guides skip because it’s not fun. I’m including it because I’ve seen creators get burned.
On cloud tools: Every platform’s ToS defines what outputs you can use commercially. Some grant full commercial rights on paid plans. Others claim a license to your outputs. Read the specific section before you monetize anything generated on a platform.
On local models: The model weights themselves have licenses. Stable Diffusion models use the CreativeML Open RAIL-M license, which allows commercial use with restrictions. Some fine-tuned models have more restrictive terms. Check the model card on Hugging Face before assuming you can use outputs commercially.
On deepfakes and real people: Generating video of real, identifiable people without consent is legally and ethically fraught in most jurisdictions, regardless of which tool you use or what its filters allow. Several countries have enacted or are actively passing legislation specifically targeting AI-generated likeness content. This isn’t a gray area — treats it as a hard limit.
On “uncensored” framing: What’s technically possible and what’s legally safe aren’t the same thing. Local tools give you more freedom; that freedom comes with more personal responsibility for how you use it.
Conclusion
The right tool depends entirely on what you’re actually trying to make.
If you’re animating stylized illustrations, concept art, or fantasy sequences — cloud tools will handle most of your work, and the setup-free experience is genuinely worth the content policy tradeoffs. If you’re hitting systematic rejections on legitimate creative inputs, local is the path. If you’re building something programmatic, API access is the move.
The “uncensored” framing gets thrown around a lot in this space. What it actually means in practice: more creative latitude, not no rules. Local models give you the most control — but you’re also taking on the most responsibility for how you use that control.
I’ll keep updating this as the tools evolve — the i2v space is moving fast enough that some of what’s here will look different in six months. If something’s changed or you’ve found a better workflow, drop a note.
FAQ
Q: Why does my image-to-video AI keep failing without an error? In most cases, this isn’t a technical issue — it’s filtering. Cloud-based tools often block inputs at the API level before they reach the model. If your prompt or image triggers a moderation rule, the system may return a blank or failed output instead of a clear warning.
Q: Are “uncensored” AI video generators actually unrestricted? Not completely. “Uncensored” usually means fewer platform-level filters, not zero limitations. Even local models are trained on curated datasets, so certain biases and constraints are still built in. Think of it as more flexibility, not total freedom.
Q: What hardware do I need to run image-to-video models locally? For most modern workflows, a GPU with at least 12GB VRAM is the practical minimum. Higher-end models or longer videos may require 16GB–24GB VRAM. You can run lower settings on weaker hardware, but expect reduced resolution and slower performance.
Previous Posts: