Hi, I’m Dora. I spend a lot of time testing AI video tools, especially anything that can turn static content into something usable without a full production budget.
I was cleaning up an old brand shoot last week — decent photos, no video budget — when it hit me: I hadn’t seriously tried Akool’s image-to-video feature since they rolled out multi-model support. I’d been defaulting to Runway for everything motion-related, mostly out of habit. So I stopped what I was doing, pulled up Akool, and spent the better part of an afternoon animating stills.
Here’s the honest version of what I found.
What Is Akool AI?

Akool is a full AI video and image creation platform — not a single-trick tool. It started gaining real traction as a face swap and avatar tool, but it’s grown into something much broader: video translation in 150+ languages, talking avatars, streaming avatars, AI video editing, image generation, and yes — image-to-video animation.
The company has worked with brands like Coca-Cola and McDonald’s, and has grown into a more mature product offering over the past year.
But — and this is the part nobody talks about — most people who sign up for Akool never find the image-to-video tool. It’s tucked under a product menu that’s genuinely overwhelming on first visit. Which is why I’m writing this.
How to Access Akool Image to Video
Free vs. Paid
There’s a free tier. It’s legitimately usable for testing — you get basic access to the Akool model, 720P output, and a small credit allocation to start.
The catch: the free plan adds a watermark, limits you to one concurrent generation, and only gives you access to the Akool Basic model (not Kling, Sora, Seedance, or Google Veo). So if you want to compare model outputs or export anything you’d actually post publicly, you’re upgrading.
The Pro plan starts at roughly $15/month, which gets you up to 4K output, access to all video and image models, no watermark, and 600 credits to start. Pro Max runs about $29.5/month and bumps that to 8K resolution and API access. Check the current Akool pricing page before you commit — their tiers have been updating regularly.
Credit System Explained
This is the part that trips people up. Akool runs on a credit system, and different models burn credits at very different rates.
According to Akool’s official help center, here’s the breakdown for just the Akool model:
- 720p — 20 credits per 5 seconds
- 1080p — 25 credits per 5 seconds
- 4K — 30 credits per 5 seconds

Premium models like Sora 2, Kling 3.0, or Google Veo 3.1 cost more per generation. The help center doesn’t publish all the per-model rates in one place, which is mildly annoying.
My rough experience: a Pro plan’s 600 credits gets you somewhere between 15–30 generations depending on your resolution and model choices. If you’re doing a lot of 4K Kling runs, those go fast.
Step-by-Step: Image to Video with Akool
Okay. Here’s the actual workflow — no fluff.
Step 1: Upload your image
Log in, then find “Image to Video” from the dashboard. It’s listed under the Products menu — look for the “Tools” section. Upload your image directly. PNG and JPG both work. For best results, use something with a clear subject, good lighting, and no heavy compression artifacts.
I tested with three types: a portrait photo, a product flat-lay, and a landscape still. All three animated. The portrait worked best.
Step 2: Choose your model
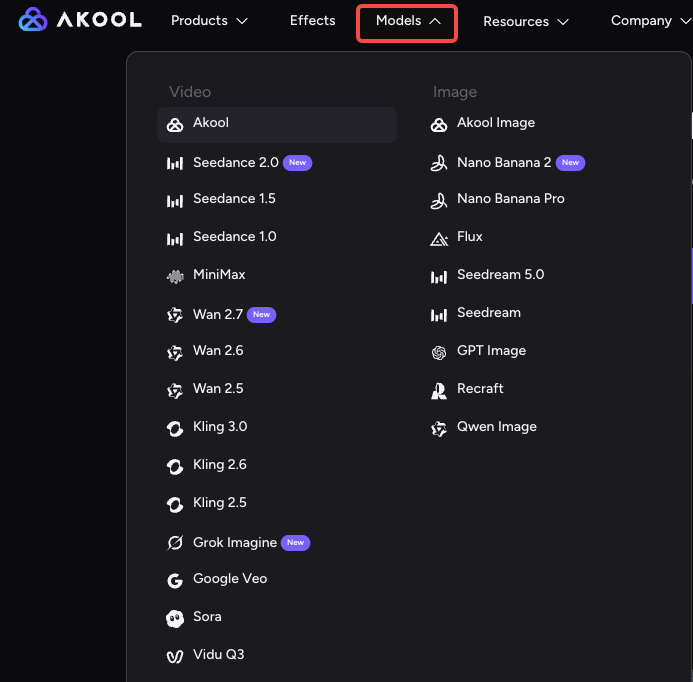
This is where it gets actually interesting. As of April 2026, Akool offers:
- Akool Premium (their native model), —the fastest, most affordable)
- Seedance 2.0
- Kling 3.0
- Sora
- Wan 2.7
- Nano Banana Pro (great for faces)
- Minimax
- Google Veo
For portraits, I got the cleanest facial expressions from Nano Banana Pro and Kling. For landscape/product shots, Wan 2.7 produced more convincing physical motion. Sora looks great but takes longer and costs more — worth it for a hero asset, less worth it for testing.
Step 3: Write your prompt
This step matters way more than most tutorials admit. Vague prompts get vague results.
What works: lead with the action, then describe the subject. “Slowly blinking and smiling, soft studio lighting, woman looking at camera” beats “portrait of a woman.” Add negative prompts too — “no glitch, no blur, no extra limbs” genuinely helps, especially for hands and edges.
Step 4: Set quality and generate
Choose your resolution — start at 1080p if you’re just testing, jump to 4K for finals. Hit generate. Depending on the model and server load, you’re looking at anywhere from 30 seconds (Akool native, 720p) to several minutes (Sora, 4K).
There’s a generation queue displayed, which I appreciated. No guessing whether it’s working.
Step 5: Download or iterate
Output arrives in your results library. You can download directly as MP4. If the motion is off, adjust your prompt and regenerate — most of my “bad” generations came from under-specified prompts, not the model itself.
Output Quality — What Actually Comes Out
Honestly? Better than I expected for a platform this broad.
The portrait animations are the highlight. Faces stay coherent across the clip — expressions are natural, eyes blink correctly, there’s no uncanny valley slide effect that used to plague these tools. Nano Banana Pro in particular kept facial identity locked in across the full duration in a way that surprised me.
The weaker spot is background complexity. If your image has intricate background detail — busy textures, lots of foliage, architectural lines — there’s noticeable warping at the edges. Not catastrophic, but not clean either. Simple or blurred backgrounds work much better.
Product shots were a mixed bag. Simple objects on flat backgrounds animated cleanly. Anything with reflective surfaces or fine text on packaging got distorted. For e-commerce product video, I’d test first before committing to a full batch.
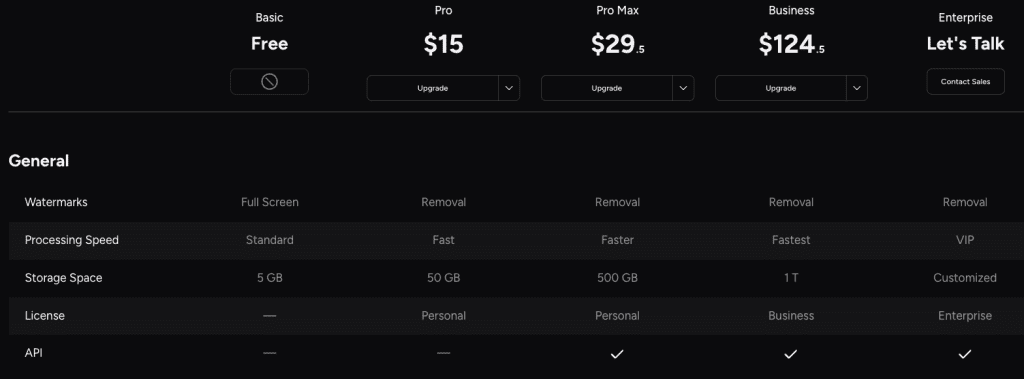
Pricing and What You Get
| Plan | Monthly Price | Credits | Max Resolution | Concurrent Jobs |
| Free | $0 | Limited trial | 720P | 1 |
| Pro | ~$39/mo | 600 | 4K | 2 |
| Pro Max | ~$79/mo | More credits | 8K | 5 |
| Business | ~$350/mo | High volume | 16K | 10 |
| Enterprise | Custom | Doesn’t expire | Custom | Custom |
Annual billing knocks roughly 30% off Pro and above.
One thing I genuinely like: credits don’t get siloed by tool. If I skip image-to-video this week and do video translation instead, the same credits work. For creators who use multiple tools, that flexibility actually matters.
Akool vs. HeyGen vs. Runway
These three come up together constantly, but they’re solving different problems.
| Akool | HeyGen | Runway | |
| Image to Video | ✅ Multiple models | Limited | ✅ Strong |
| Avatar/Talking Head | ✅ Strong | ✅ Best-in-class | ❌ Not the focus |
| Video Translation | ✅ 155+ languages | ✅ 175+ languages | ❌ |
| Face Swap | ✅ Excellent | ✅ Good | ❌ |
| Creative VFX | Basic | Basic | ✅ Best |
| Entry Paid Plan | ~$39/mo | ~$29/mo | ~$15/mo |
| Best For | Creators needing everything | Marketing/comms teams | Visual artists/filmmakers |
Here’s how I actually think about it:
Use Akool if you need a multi-tool platform — image-to-video, avatars, face swap, and translation all in one place, without juggling four subscriptions. The breadth is genuinely impressive.
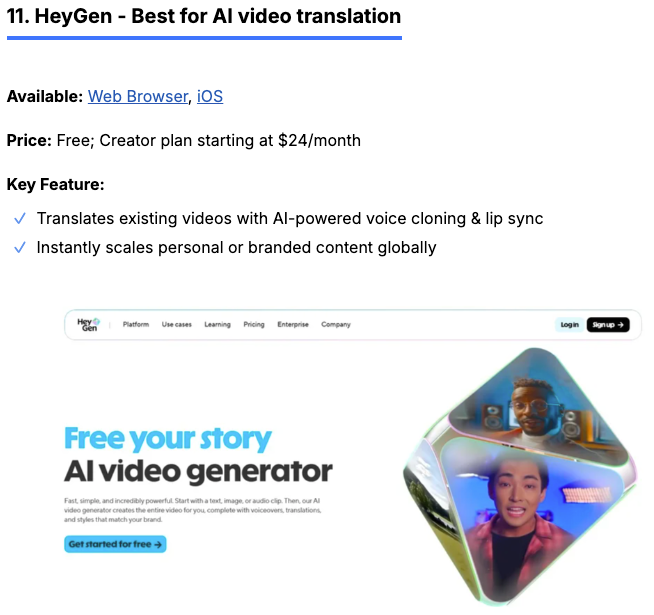
Use HeyGen if your primary use case is avatar-based marketing videos or video dubbing. Their lip-sync quality on avatar content is still a step ahead. One comparison test I ran found HeyGen’s Avatar IV lip-sync cleaner for close-up presenter videos specifically.
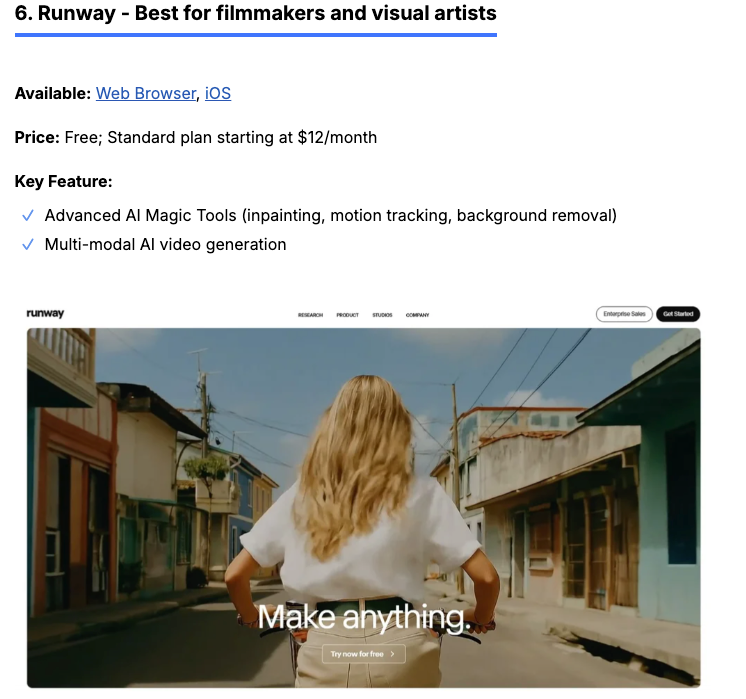
Use Runway if you need precise creative control over motion — inpainting, style transfer, scene consistency across clips. According to independent reviewer testing on CyberLink’s 2026 AI video roundup, Runway Gen-4.5 still leads to professional VFX workflows. It’s just much more limited in scope than Akool.
The credit system comparison matters here too. Runway’s free plan gives you 125 one-time credits. HeyGen’s Creator plan gives you around 15 video-minute credits at $24–29/month. Akool’s Pro plan gives you 600 credits for roughly the same price — and that’s flexible across all their tools.
Who Should Use Akool
Not everyone. Here’s my honest read:
Good fit:
- Creators who already use multiple AI tools and want consolidation
- Social media managers who need animated product shots or portrait clips fast
- Marketing teams who also do video translation or avatar content
- Anyone experimenting with image-to-video who wants to compare multiple models in one interface
Not the best fit:
- Filmmakers who need deep motion control and VFX (Runway wins there)
- Teams whose primary need is avatar-based presenter videos at scale (HeyGen’s avatar quality and template library are more mature)
- Budget-first users who only need one feature — a specialized tool is cheaper if you’re only doing one thing
One note on the learning curve: the dashboard is dense. There are genuinely a lot of tools. If you’re used to a single-purpose tool with two buttons, the first 20 minutes with Akool feels overwhelming. Give it a session before you judge.
Conclusion
Akool’s image-to-video tool is real — and it works better than its reputation suggests, especially for portrait and social content. The multi-model approach is genuinely useful: being able to test outputs across different systems on the same input and compare results side by side is something you rarely see at this level. Platforms like Runway still lead in overall ecosystem maturity, but they don’t offer this kind of flexible model switching in a single workflow.
The credit system does require a bit of upfront math, and the dashboard takes some getting used to it. But if you’re already juggling multiple AI video tools, Akool stands out as a strong consolidation option — especially as more tools start converging around similar diffusion-based architectures under the hood.
I’ll be using it more — specifically for animated portrait content and product shots where I don’t need Hollywood-level motion control. For client work where lip-sync quality on real human faces is critical, I’m still testing and comparing outputs across tools.
Try the free tier first. One session will tell you more than this review.
FAQ
Q: Where can I find the image-to-video feature in Akool? In Akool, the image-to-video tool is located under Products → Tools → Image to Video. It’s not very obvious in the UI, so many new users miss it at first.
Q: Does Akool offer a free plan for image-to-video generation? Akool does offer a free plan, but it includes limitations such as watermarked exports, 720p resolution, restricted model access, limited credits, and only one concurrent generation.
Q: Is Akool worth paying for if I want to create usable video content? Akool is generally worth paying for if you plan to publish content, as the Pro plan removes watermarks, unlocks higher resolutions, and provides access to multiple models, making it more flexible than platforms like Runway and HeyGen in terms of overall functionality.
Previous Posts: