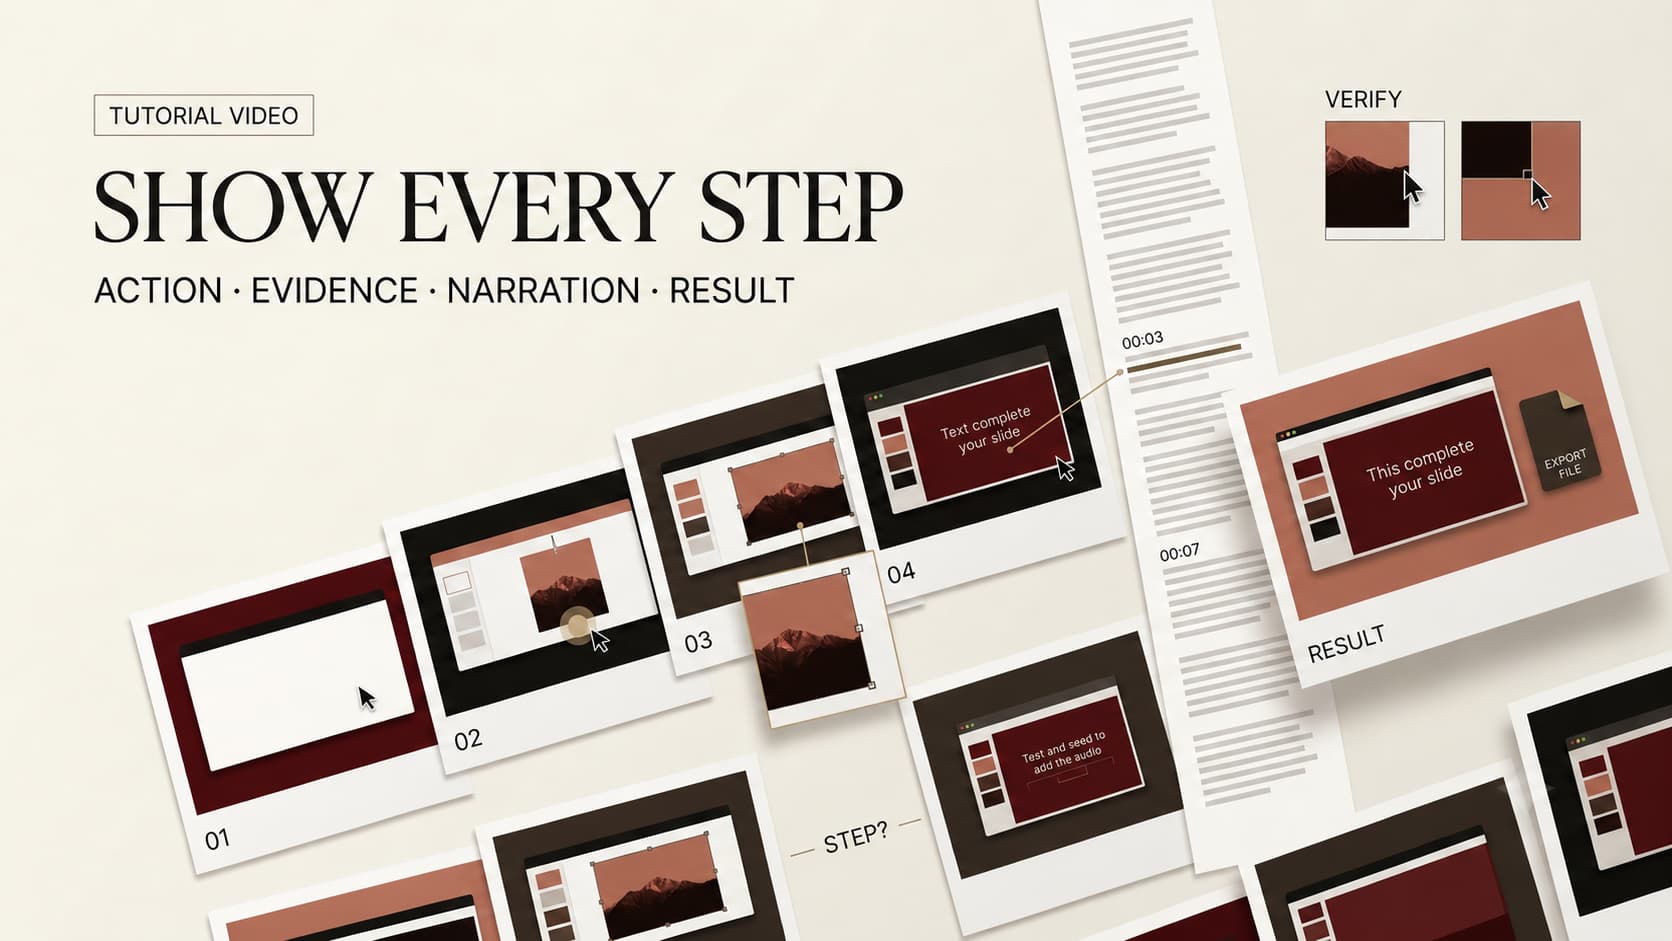
A viewer follows your screen recording, clicks where you clicked, and still ends up somewhere else. A permission prompt appeared on their account but not yours. Or the video ended on Export without showing the file. When learning how to make tutorial videos, focus on both the action and proof that it worked.
This guide follows one illustrative task: exporting open support tickets as a CSV from a fictional demo dashboard. The interface labels are examples, not claims about a real product. Replace them with verified labels and footage from the software you actually teach.
Define the Task and the Successful Result
Start with a testable sentence: “Export a CSV containing only open support tickets.” Does the learner need an account, export permission, and sample data? State those conditions early. Otherwise a missing button looks like an error in the tutorial when the viewer has a different role.
Define the end state independently of the last click. The file should appear, open, and contain only records matching the filter. This check exposes skipped steps, such as applying the filter before choosing Export. If the product emails exports, show how to retrieve the file.
Keep the scope narrow. “Learn the dashboard” belongs to a course; “export a filtered list” fits one instructional video. A subject-matter expert can review its start state, actions, and result instead of judging whether it generally feels helpful.
Write down what the learner brings to the task as well: their likely vocabulary, device, and reason for exporting. A support lead checking today’s queue may understand “open ticket” but have no idea where the downloaded file goes. That difference changes the final shot. It should show the file, not just the dashboard notification.
Write Steps That Viewers Can Observe
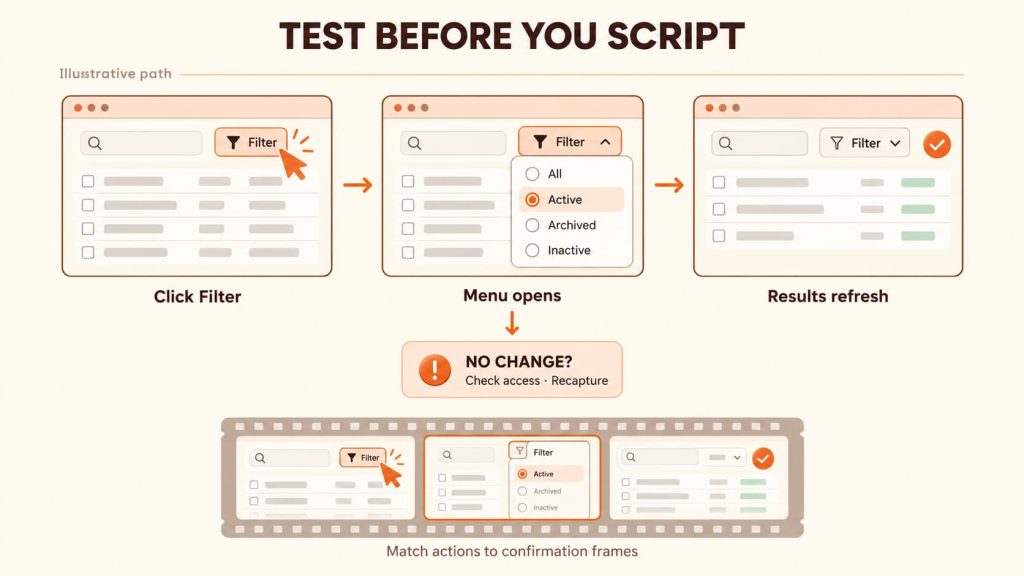
Perform the procedure in a current, authorized test account before drafting the voiceover. Note visible state changes: filter opens, status changes, results refresh, file becomes available. A script written from memory can miss the confirmation that separates success from a hopeful click.
For each step, note the action, the expected screen change, and what to do if it does not happen. Do not write a universal instruction when your tested interface shows only one observed path.
This structure helps tutorial video production during reshoots: if the filter menu moves, you know which action and confirmation frames need replacement. A script organized only by spoken paragraphs gives the editor no reliable map back to the interface.
Separate Actions, Explanations, and Warnings
Give actions their own beats. “Set Status to Open, then apply the filter” directs the viewer. “This excludes closed tickets” explains why. “Check your export permission” is a prerequisite. The cursor should stop while the viewer processes the difference.
In the demo dashboard example, the action ends when the ticket list changes. If customer records are involved, put the data-handling warning before export, not after saving the file.
Say the control label once, then name the expected response: “The list now shows open tickets.” The viewer can compare their screen with yours.
Plan Pauses, Zooms, and On-Screen Labels
Hold on changes viewers must inspect: a selected filter, a permission notice, a file confirmation. Mark those pauses in the shot plan; a late freeze may leave the cursor covering the important field.
Zoom without losing context. A tight crop around Export can hide the selected filter. Use short labels, such as “Open tickets only,” away from live controls and captions. If labels crowd the UI, recapture a cleaner frame.
Capture Real Interface Evidence
A screen recording tutorial asks people to act on exact menus and labels. Record the current interface, including the result, in the account and version you teach. Name the edition on screen; never pass mixed old and new UI footage off as one session.
Record the Current UI and Hide Private Data
Use a demo workspace or approved sample data. Close notifications and remove names, addresses, tokens, and customer records from the capture path. A cropped frame cannot protect data in a pop-up or audio notification. Review raw footage before sharing it; a blurred export does not erase exposed source files.
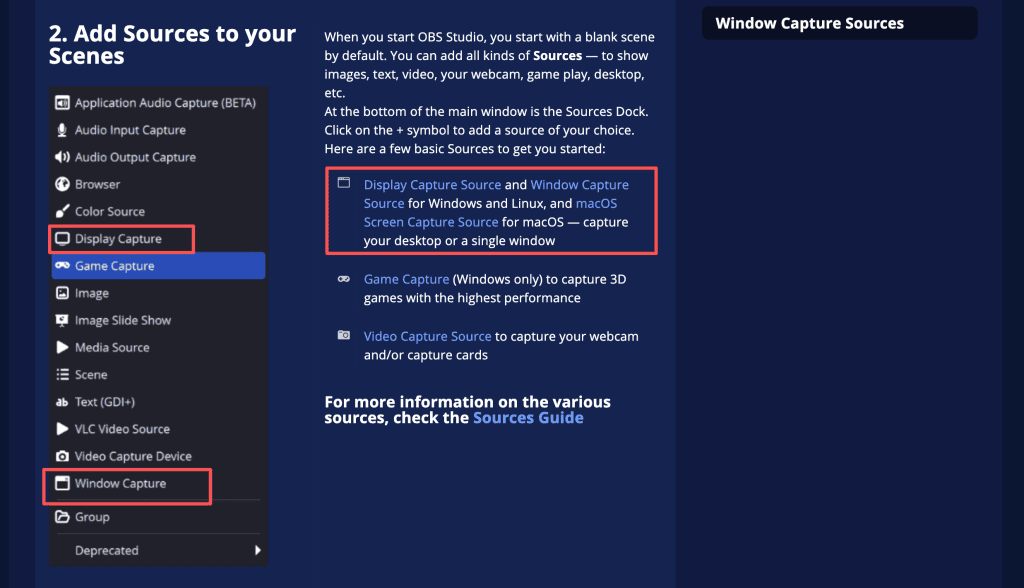
OBS supports display or window capture and a short test recording. Clipchamp lets you choose a screen, window, or browser tab. Recorder controls vary, so inspect a test file for readable text, cursor visibility, clean audio, and private data.
Record a moment before and after each action. An editor can trim extra footage but cannot recover a closed menu. If the UI changes, re-record the step with its surrounding context.
After recording, play the untouched file from beginning to end. Check that the filter value, export control, and final CSV are genuinely visible. A flawless narration recorded later cannot establish what happened on screen. Keep the original capture under controlled access so a reviewer can trace a disputed edit back to source footage.
Use Generated Visuals Only for Illustration
Generated graphics can illustrate where an exported file goes next. Label them as illustrations. They cannot stand in for a product screen, successful export, or unobserved permission state. An AI-drawn interface may look plausible while showing buttons that do not exist.
Use only licensed images, recordings, and performances. Do not make a synthetic employee, customer, or expert appear to demonstrate real work. If you cannot capture a current UI state, identify what remains unverified.
Assemble, Narrate, and Caption the Tutorial
Cut around decisions. Keep filter selection near the refreshed results, and leave time after export confirmation for a learner to check their file. Show a verified error path near the relevant step rather than interrupting the whole lesson with troubleshooting.
Listen once without watching: are the control and success check clear? Watch again without sound: can you track the pointer and changed state? These passes catch gaps that a full-speed review misses. Keep music below spoken controls and warnings.
Caption speech and meaningful sounds; correct product names and control labels by hand. Plan captions and descriptions during production, then narrate essential visual changes too: “The list now shows open tickets” helps someone who cannot see the small status badge. Keep the transcript aligned with the final edit.
Watch the render in the audience’s likely player and screen size. Editing previews can conceal unreadable labels in a narrow training player. Recheck captions and the success state after export.
A how-to video may need two versions of a crowded step: the full screen for orientation and a close view for legibility. Keep them in the same sequence, with a visible transition, so the crop does not look like the interface changed. If captions cover the control, move the crop or change the framing rather than hiding the caption at the hardest moment.
Test the Tutorial With a First-Time Viewer
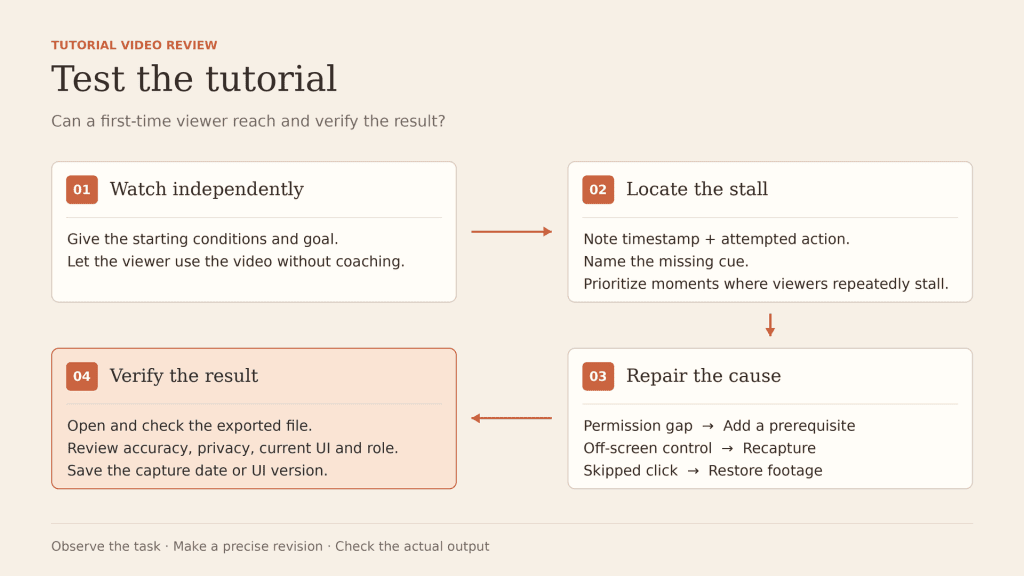
Give a colleague the starting conditions and goal, then let them use the candidate video without coaching. Watch where they pause or choose another control. Ask to see the finished file, not merely whether the video felt clear. Realistic task scenarios work best when the test prompt does not reveal the interface steps.
If they cannot find Export, diagnose why. An absent permission needs a prerequisite; an off-screen button needs recapture; a skipped click needs restored footage. Voiceover cannot repair a false screen path.
Have a reviewer check accuracy and privacy in the final instructional video. They should know the current UI and intended account role. Store the version or capture date with project files so you can spot stale instructions later. The test ends when a first-time viewer reaches and verifies the result.
One stalled viewer does not prove the lesson has failed for everyone. It gives you a location to inspect. If several people stop at the same moment, prioritize that moment over cosmetic polish. A good revision note names the timestamp, the viewer’s attempted action, and the missing cue; “make this clearer” gives the editor little to work with.
FAQ
How should a tutorial disclose steps that require paid access?
Name the required plan or permission early and at the locked step. Verify current labels in official vendor information. Show an access restriction only if your test account displays it, and tell viewers which parts remain available without payment.
Should keyboard shortcuts appear in captions?
Caption spoken shortcuts accurately. For a silent shortcut needed to finish, use a visual label or narrate the action. Include the menu route when practical because shortcuts vary by system. Do not add unsaid text to speech captions.
How should multiple software versions be handled?
Identify the edition, platform, and capture date in lesson notes. Update footage for small UI changes; publish separate lessons for divergent paths. Mark any version switch visibly instead of splicing interfaces together.
What is the best way to correct a tutorial after release?
Fix the video, captions, transcript, and help text together. State what changed and when, particularly if the old step could export wrong data. If the host cannot replace media, point viewers to the corrected lesson and retire the old one. Log the correction.
Can one tutorial be split into a short series?
Yes, if each part has its own observable outcome. A dashboard series might separate filtering from exporting, with each episode naming the next one’s start state. Keep the success check with the action it verifies.